Welcome to Dikfu.com, where we transform complex home entertainment challenges into simple, satisfying DIY victories! As your seasoned expert with over 15 years in the trenches of Tv Mount installations, I’ve seen it all. From tiny screens to massive home cinema displays, getting your television securely mounted on the wall is a game-changer for aesthetics, space-saving, and achieving that perfect viewing angle. But let’s be real, diving into the world of a new TV mount can feel a bit overwhelming with all the options out there. Don’t sweat it! We’re here to cut through the jargon and empower you to confidently select and install the ideal TV mount for your home, making your living space both stylish and functional.
Understanding the Different Types of TV Mounts
Before you grab your toolbox, let’s explore the fundamental types of TV mounts. Each offers a unique set of benefits and is designed for specific viewing needs and room layouts. Understanding these distinctions is the first step to making an informed choice.
Fixed TV Mount: The Sleek, Low-Profile Choice
Imagine your TV almost flush with the wall, like a masterpiece in a gallery. That’s the beauty of a fixed TV mount. These mounts offer the lowest profile, holding your television as close to the wall as possible for a truly minimalist look. They’re generally the most affordable and easiest to install, having fewer moving parts.
- Pros: Ultra-slim profile, budget-friendly, highly secure, easy installation.
- Cons: No adjustability (no tilt, swivel, or extension), limited access to rear ports.
- Best For: Rooms where your seating is directly in front of the TV at an optimal viewing height, such as a dedicated media room or bedroom where glare isn’t an issue.
|
Our Picks for the Best TV Mount in 2026
As an Amazon Associate I earn from qualifying purchases.
|
||
| Num | Product | Action |
|---|---|---|
| 1 | monTEK Motorized Ceiling TV Mount for 43-86 Inch TVs, Heavy-Duty 121lbs (4X Load Tested), Off-Center VESA Compatible, Electric Flip Down with Remote/App/Voice Control, Fits Flat & Pitched Roof |

|
| 2 | Magnetic Monitor Wall Mount for Steel Surfaces, Fits 13 to 34 Inch Screens, Holds up to 22 lbs, VESA 75/100 Compatible Wall Mount for Computer and TV Monitor, No-Drill Installation with All Screws |
|
| 3 | Perlegear Full Motion TV Wall Mount for Most 42–86 inch Flat Curved TVs up to 132 lbs, 12″/16″ Wood Studs, Bracket with Articulating Arms, Swivel, Tool-Free Tilt, Max VESA 600x400mm PGLF12 |
|
| 4 | MOUNTUP Full Motion TV Wall Mount for Most 26-60 Inch TVs, Max VESA 400x400mm Wall Mount TV Bracket with Swivel Tilting Extension Level Adjustment for LED LCD Flat Curved TVs Up to 77 LBS, MU0018 |
|
| 5 | USX Mount Full Motion TV Wall Mount for Most 42-90 inch Flat Screen/LED/4K, TV Mount Bracket Dual Swivel Articulating Tilt 6 Arms, Max 16\" Wood Studs, VESA 600x400mm, Holds up to 132lbs |
|
| 6 | Mounting Dream TV Wall Mount for 32-65 Inch Television,Mount with Swivel and Tilt, Full Motion Bracket with Articulating Dual Arms, Fits 16inch Studs, Max VESA 400X400 mm, 99lbs, MD2380 |
|
| 7 | Mounting Dream TV Wall Mount for Most 37-75 Inch TVs, Universal Tilt TV Mount Fit 16\", 18\", 24\" Stud with Loading Capacity 132lbs, Max Vesa 600 x 400mm, Low Profile Flat Wall Mount TV Bracket |
|
| 8 | USX MOUNT Full Motion TV Wall Mount for Most 32-70 inch TVs up to 99 lbs, Wall Mount Bracket with Dual Articulating Arms, Swivel, Tilt, Max VESA 400x400mm, TV Mount Fits 12”/16” Wood Studs |
|
| 9 | Pipishell Full Motion TV Wall Mount for Echo Show 21/15 and 13-43 Inch Flat Curved Screen TVs & Monitors, Max VESA 200x200mm up to 44lbs, TV Mount Wall Bracket with Rotation Swivel Tilt Extension |
|
| 10 | Amazon Basics Full Motion Articulating TV Wall Mount, with Swivel and Tilt, for 26\" to 55\" TVs and Flat Panels up to 80 Lbs, VESA Compatible, Black |
|
Tilting TV Mount: Tackling Glare and High Placement
Ever tried watching your favorite show only to be blinded by a window glare? A tilting TV mount is your solution. Similar to fixed mounts in their wall-hugging design, these mounts add the crucial ability to tilt your TV up or down by a few degrees. This simple movement can dramatically reduce glare and provide a more comfortable viewing angle if your TV is mounted slightly above eye level, like over a fireplace.
- Pros: Reduces glare, improves viewing from higher positions, still relatively low-profile.
- Cons: Only vertical tilt, no side-to-side swivel or extension.
- Best For: Living rooms or spaces where the TV needs to be mounted higher than ideal eye level (e.g., above a console or mantelpiece), or in rooms with varying light sources.
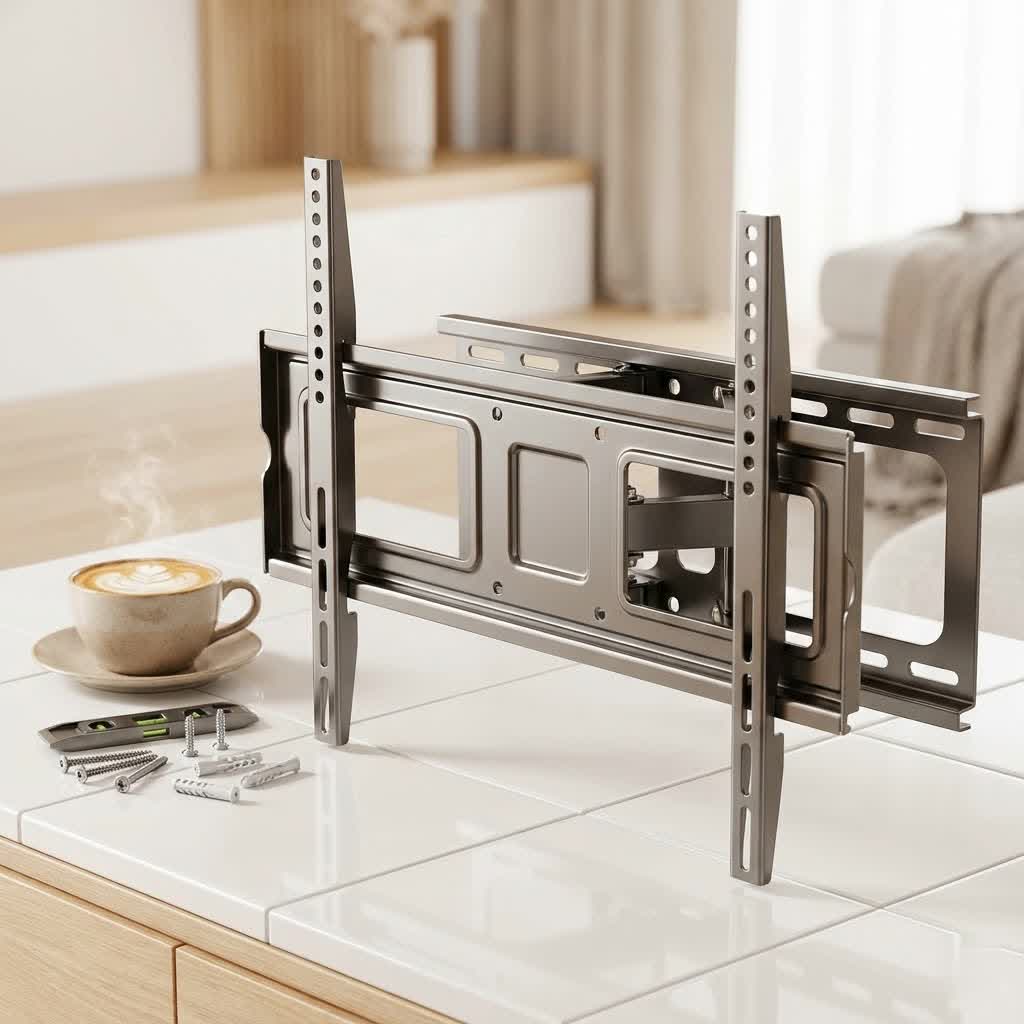
Full-Motion TV Mount: Unrivaled Flexibility and Viewing Angles
For those who crave ultimate control and versatility, the full-motion TV mount (often called an articulating or swivel mount) is the champion. These sophisticated mounts allow you to tilt, swivel, and extend your TV away from the wall, sometimes even turning it almost 180 degrees. This flexibility makes them perfect for open-plan living areas, corner installations, or rooms with multiple seating arrangements where everyone deserves a great view.
- Pros: Maximum flexibility for viewing angles, excellent for glare reduction, easy access to TV ports and cables for future connections, great for corner mounting.
- Cons: More expensive, can be bulkier and protrude further from the wall, requires very secure installation.
- Best For: Large rooms, open-concept homes, multi-purpose spaces, or situations where you frequently need to adjust the TV’s position.
“Choosing the right mount isn’t just about aesthetics; it’s about optimizing your viewing experience for comfort and safety. A fixed mount keeps things tidy, a tilt mount banishes glare, and a full-motion mount puts you in complete control,” advises Liam Thompson, Senior Installation Specialist at Dikfu.com.
Choosing the Right TV Mount for Your Space
Now that you know the types, how do you pick the one for your television and your home? It boils down to a few critical factors.
Matching Your TV’s Size and Weight
This is non-negotiable for safety. Every TV mount comes with specific weight and size limits. You absolutely must ensure your chosen mount can safely support your TV’s dimensions and, more importantly, its weight. Check your TV’s manual for its exact weight, and always choose a mount rated to hold more than your TV actually weighs. Better safe than sorry!
VESA Compatibility: The Universal Standard
Have you ever noticed those four screw holes on the back of your TV? That’s the VESA mounting pattern. VESA (Video Electronics Standards Association) provides a universal standard for mounting interfaces. You’ll find a measurement like “200x200mm” or “400x400mm” in your TV’s manual or by measuring the distance between the holes (horizontal x vertical) yourself. Your TV mount must match this VESA pattern to ensure a perfect fit.
Wall Type Matters: Drywall, Studs, Brick, or Concrete?
The type of wall you’re mounting to is paramount for a secure installation.
- Drywall with Wooden Studs: This is the most common scenario. You must attach your TV mount directly into the wooden studs behind the drywall. Drywall alone is not strong enough to support the weight of a TV.
- Brick or Concrete Walls: These sturdy walls can handle heavy loads, but require specialized masonry anchors and a hammer drill for installation.
- Metal Studs or Plaster Walls: These require specific fasteners and often professional assessment, as they can be more challenging.
Ignoring your wall type is one of the quickest ways to an unfortunate (and expensive) accident. Always locate those studs!
Your Viewing Habits and Room Layout
Think about how you use your space. Do you watch TV from a single spot, or do you move around the room? Is there a window that causes annoying glare at certain times of the day? Your answers will guide your mount choice. A fixed mount is great for a dedicated viewing area, a tilting mount for glare issues or higher placement, and a full-motion mount provides the most flexibility for dynamic living spaces.
Step-by-Step Guide to a Secure TV Mount Installation
Alright, let’s get down to business! With the right TV mount in hand, following these steps will ensure a safe and professional installation.
Gather Your Tools: Preparation is Key
Before you even think about drilling, make sure you have everything you need. A little preparation goes a long way.
- Stud Finder: Absolutely essential for locating wooden studs.
- Power Drill: With appropriate drill bits for pilot holes and lag bolts.
- Level: To ensure your TV isn’t crooked (a common mistake!).
- Measuring Tape & Pencil: For precise marking.
- Screwdriver: Phillips head for the TV brackets.
- Wrench/Socket Set: For tightening lag bolts securely.
- Safety Glasses: Protect those eyes!
- Your TV Mount Hardware: All the bolts, washers, and spacers included with your mount.
Locating the Perfect Spot and Wall Studs
First, decide on the ideal height for your TV. A good rule of thumb is to have the center of the screen at eye level when you’re seated in your primary viewing position. Once you’ve determined the approximate height, use your stud finder to locate the center of at least two adjacent wooden studs in that area. Mark them clearly with your pencil. These studs are where your TV mount will get its strength.
Marking, Drilling, and Securing the Wall Plate
Hold the mount’s wall plate against the wall, centered over your marked stud locations, and use your level to ensure it’s perfectly horizontal. Mark the precise spots for your pilot holes. Now, using a drill bit slightly smaller than your lag bolts (check your mount’s instructions!), carefully drill pilot holes into the center of the studs. Once drilled, position the wall plate, insert the lag bolts, and use your wrench or socket to tighten them securely. The plate should feel absolutely rock-solid.
Attaching the Brackets to Your TV
Gently lay your TV face down on a clean, soft surface (like a blanket on a table) to protect the screen. Locate the VESA mounting holes on the back of your TV. Attach the vertical mounting brackets from your TV mount to these holes using the screws provided with the mount. Make sure they are oriented correctly and tightened firmly, but don’t overtighten. Some mounts include spacers to allow better airflow or space for cables; use them if recommended.
Mounting the TV to the Wall Plate
This is typically a two-person job for safety, especially with larger TVs. Carefully lift the TV, aligning the brackets on the back of the TV with the wall plate you installed. Hook or slide the TV onto the wall plate according to your mount’s specific design. Once it’s securely in place, engage any safety locks or screws that prevent the TV from accidentally lifting off the mount. Double-check everything for stability.
Elevating Your Setup: Cable Management and Aesthetics
A beautifully mounted TV can quickly lose its appeal if a tangle of wires hangs below it. Here’s how to achieve that clean, professional look.
Hiding Those Pesky Wires
- In-Wall Cable Routing: For the cleanest look, consider running your cables through the wall. This often involves cutting small access holes behind the TV and near your media console. If you’re not comfortable with this, a professional electrician can do it safely.
- On-Wall Cable Covers/Raceways: These are affordable and effective solutions that attach to your wall and neatly conceal cables. They can often be painted to match your wall color.
- Power Outlet Behind the TV: For true minimalism, have an electrician install a dedicated power outlet directly behind where your TV will sit. This eliminates visible power cords.
Optimizing Your Viewing Experience
Once your TV is mounted, take the time to fine-tune it. Adjust a tilting TV mount to eliminate glare, or extend and swivel a full-motion mount to find the perfect angle for every seat in the room. A well-mounted TV isn’t just about being on the wall; it’s about being perfectly positioned for your enjoyment.
Common TV Mount Installation Mistakes and How to Avoid Them
Even with the best intentions, mistakes can happen. As someone who’s fixed countless DIY mishaps, here are the most frequent errors and my pro tips to avoid them.
Misjudging TV Height
The Mistake: Mounting the TV purely based on aesthetics, often too high, leading to neck strain.
The Fix: Always consider eye level when seated. For most people, this means the center of the TV screen should be about 42-48 inches from the floor, but always test what feels comfortable for you in your primary viewing position.
Ignoring Wall Studs or Using Wrong Anchors
The Mistake: Drilling into drywall without hitting a stud, or using inadequate anchors for your wall type. This is a recipe for disaster.
The Fix: Invest in a reliable stud finder and use it diligently. For drywall, always secure your TV mount into at least two wooden studs. For brick or concrete, use heavy-duty masonry anchors specifically designed for the job. Never trust drywall alone!
Choosing an Incompatible Mount
The Mistake: Picking a TV mount that doesn’t match your TV’s weight, size, or VESA pattern.
The Fix: Thoroughly check your TV’s specifications for weight, screen size limits, and VESA dimensions. Then, verify that your chosen mount meets or exceeds all these requirements.
Forgetting About Cable Access and Future Needs
The Mistake: Installing the TV only to realize ports are blocked or there aren’t enough cables run through the wall for future devices.
The Fix: Before mounting, plan your cable routing. Consider what devices you’ll connect now and in the future. It’s always smart to run a few extra HDMI cables through the wall—it’s much easier to do it now than later!
Improperly Tightening Hardware
The Mistake: Not tightening the lag bolts enough, or overtightening and stripping screws.
The Fix: Use the right tools, like a ratcheting wrench or an impact driver for lag bolts, to ensure they are snugly tightened. Follow the manufacturer’s torque specifications if provided. The mount should feel absolutely rigid against the wall.
FAQs About TV Mount Installation
Got more questions? Here are some common inquiries we hear from our Dikfu.com community:
Q1: Can I mount a TV to drywall without studs?
A1: While some specialized drywall anchors exist, it is strongly discouraged to mount a TV solely into drywall without securing it to wall studs, especially for larger or heavier televisions. Always aim for wooden studs for maximum safety and stability.
Q2: What is the VESA standard?
A2: VESA stands for the Video Electronics Standards Association. It’s a universal standard that defines the pattern of mounting holes on the back of your TV and on the TV mount. Matching your TV’s VESA pattern (e.g., 400x400mm) with your mount’s VESA compatibility is crucial for a proper fit.
Q3: How high should I mount my TV?
A3: The ideal height positions the center of your TV screen at eye level when you are comfortably seated in your main viewing area. For most living rooms, this typically falls between 42 to 48 inches from the floor to the center of the screen, but always personalize this to your seating.
Q4: What tools do I need to install a TV mount?
A4: Essential tools include a stud finder, power drill, drill bits, level, measuring tape, pencil, screwdriver, and a wrench/socket set. Always refer to your specific TV mount manual for any unique tool requirements.
Q5: How do I hide TV wires?
A5: You have several options: running cables through the wall (best for a clean look, often requires professional help), using on-wall cable management raceways that can be painted to blend in, or installing a recessed power outlet behind the TV.
Ready to Elevate Your Entertainment?
Mounting your TV can transform your living space, making it feel more expansive and modern, while enhancing your viewing pleasure. By understanding the different types of TV mounts, carefully choosing the right one for your TV and wall, and following our expert installation guide, you’re well on your way to a secure and stunning setup. At Dikfu.com, we believe that with the right knowledge and tools, anyone can achieve a professional-quality installation. Don’t be shy – dive in, take your time, and enjoy the incredible benefits of a perfectly mounted TV. Share your setup experiences and tips with us; we love hearing from our community!