A tilting TV mount is an ideal solution for optimizing your viewing experience, minimizing glare, and ensuring perfect TV positioning without excessive cost or space. These mounts allow vertical adjustment, typically within a 5 to 15-degree range, making them perfect for high-mounted TVs or rooms with challenging lighting. This guide covers everything from understanding their advantages to a step-by-step installation process.
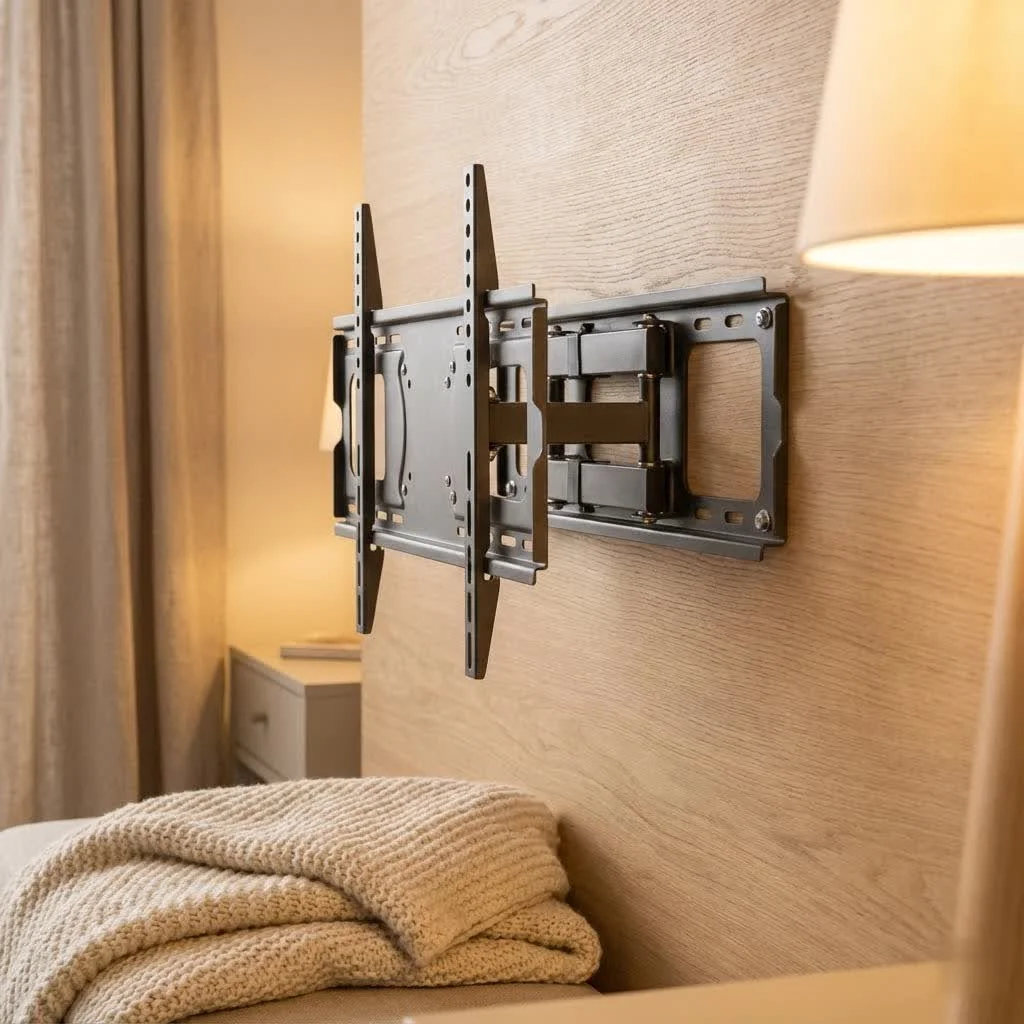 TV mount installed on a wall with a large flat-screen TV” style=”margin: 20px auto;width: 800px;max-width: 100%;height: auto” />
Why Choose a Tilting TV Mount? Unlocking Your Ideal Viewing Experience
The tilting TV mount isn’t just another piece of hardware; it’s a major upgrade for anyone looking to optimize their TV’s placement and their personal comfort. Its primary function allows you to adjust your TV vertically, typically within a 5 to 15-degree range, though some robust models offer even more flexibility. This seemingly small movement packs a powerful punch, addressing some of the most common viewing frustrations.
Say Goodbye to Glare: The Glare-Free Advantage
Ever found yourself squinting at your screen, trying to make out details through a frustrating reflection from a window or overhead light? A major benefit of a tilting TV mount is its ability to combat glare effectively. By simply adjusting the downward or upward angle of your TV, you can redirect those light reflections, ensuring a clear, crisp picture, no matter the time of day or the lighting conditions in your room. This simple adjustment means uninterrupted movie nights and crystal-clear sports viewing.
Perfect Angles, No Neck Strain: Ideal for High Mounting
Mounting your TV higher on the wall, perhaps above a fireplace or in a bedroom where you watch from bed, can be a fantastic space-saving solution and create a dramatic focal point. However, this often leads to an awkward viewing angle that can cause uncomfortable neck strain over time. This is where the tilting TV mount truly shines. It allows you to angle the screen downwards, bringing the top portion of the TV more into your natural line of sight. This subtle but significant adjustment can transform an uncomfortable viewing position into one that’s ergonomic and enjoyable, making your high-mounted TV practical for everyday use. “A tilting mount is essential for any TV placed above eye level,” notes Dr. Alex Sharma, Lead Engineer at Dikfu Labs. “It corrects the viewing angle, preventing the common ‘crane neck’ syndrome and enhancing overall comfort.”
Sleek & Space-Saving: A Low-Profile Solution
While offering more adjustability than a fixed mount, a tilting TV mount maintains a relatively low profile. It keeps your television close to the wall, typically protruding just a few inches, which helps maintain a clean, modern aesthetic in your living space. This design is particularly advantageous in smaller rooms or apartments where every inch counts, allowing you to free up valuable floor space that a traditional TV stand would occupy. You get the benefit of angle adjustment without the bulk sometimes associated with full-motion setups.
Effortless Cable Access: Practicality Meets Design
|
Our Picks for the Best TV Mount in 2026
As an Amazon Associate I earn from qualifying purchases.
|
||
| Num | Product | Action |
|---|---|---|
| 1 | Perlegear Full Motion TV Wall Mount for Most 42–86 inch Flat Curved TVs up to 132 lbs, 12″/16″ Wood Studs, Bracket with Articulating Arms, Swivel, Tool-Free Tilt, Max VESA 600x400mm PGLF12 |

|
| 2 | MOUNTUP Full Motion TV Wall Mount for Most 26-60 Inch TVs, Max VESA 400x400mm Wall Mount TV Bracket with Swivel Tilting Extension Level Adjustment for LED LCD Flat Curved TVs Up to 77 LBS, MU0018 |
|
| 3 | Amazon Basics Full Motion Articulating TV Wall Mount, with Swivel and Tilt, for 26\" to 55\" TVs and Flat Panels up to 80 Lbs, VESA Compatible, Black |
|
| 4 | Mounting Dream TV Wall Mount for 32-65 Inch Television,Mount with Swivel and Tilt, Full Motion Bracket with Articulating Dual Arms, Fits 16inch Studs, Max VESA 400X400 mm, 99lbs, MD2380 |
|
| 5 | monTEK Motorized Ceiling TV Mount for 43-86 Inch TVs, Heavy-Duty 121lbs (4X Load Tested), Off-Center VESA Compatible, Electric Flip Down with Remote/App/Voice Control, Fits Flat & Pitched Roof |
|
| 6 | Mounting Dream TV Wall Mount for Most 37-75 Inch TVs, Universal Tilt TV Mount Fit 16\", 18\", 24\" Stud with Loading Capacity 132lbs, Max Vesa 600 x 400mm, Low Profile Flat Wall Mount TV Bracket |
|
| 7 | Pipishell Full Motion TV Wall Mount for Echo Show 21/15 and 13-43 Inch Flat Curved Screen TVs & Monitors, Max VESA 200x200mm up to 44lbs, TV Mount Wall Bracket with Rotation Swivel Tilt Extension |
|
| 8 | Magnetic Monitor Wall Mount for Steel Surfaces, Fits 13 to 34 Inch Screens, Holds up to 22 lbs, VESA 75/100 Compatible Wall Mount for Computer and TV Monitor, No-Drill Installation with All Screws |
|
| 9 | USX MOUNT Full Motion TV Wall Mount for Most 32-70 inch TVs up to 99 lbs, Wall Mount Bracket with Dual Articulating Arms, Swivel, Tilt, Max VESA 400x400mm, TV Mount Fits 12”/16” Wood Studs |
|
| 10 | USX Mount Full Motion TV Wall Mount for Most 42-90 inch Flat Screen/LED/4K, TV Mount Bracket Dual Swivel Articulating Tilt 6 Arms, Max 16\" Wood Studs, VESA 600x400mm, Holds up to 132lbs |
|
One of the often-overlooked benefits of a tilting mount is the slight gap it creates between the back of your TV and the wall. This extra space proves invaluable when you need to access your TV’s ports for connecting new devices, swapping out HDMI cables, or performing routine maintenance. Unlike fixed mounts, which can make rear-panel access a frustrating challenge, a tilting mount offers just enough wiggle room to make these tasks considerably easier, saving you time and hassle.
Tilting vs. Fixed vs. Full-Motion: Finding Your Perfect Match
Choosing the right TV mount can feel daunting with so many options available. Let’s break down the three main types to help you understand why a tilting mount might be your sweet spot.
Fixed Mounts: The Minimalist’s Choice
Fixed TV mounts are the simplest and most budget-friendly option. They hold your TV flat against the wall, creating a super-sleek, low-profile look. There’s no movement or angle adjustment whatsoever. These are ideal if your TV is mounted at eye level, in a room with consistent lighting, and you primarily view it from one specific, central seating position. Installation is typically straightforward, making them a popular choice for those who prioritize a minimalist aesthetic above all else. However, they offer no flexibility for glare reduction or adjusting viewing angles.
Full-Motion Mounts: The Ultimate in Flexibility
Also known as articulating or swivel mounts, full-motion TV mounts offer the most versatility. They can extend out from the wall, swivel side-to-side, and even tilt up or down. This maximum flexibility is fantastic for rooms with multiple viewing areas, tricky corner installations, or if you frequently need to access the back of your TV. The downside? They are generally the most expensive, have a more complex installation process, and protrude further from the wall when retracted, potentially impacting the room’s aesthetic.
Why Tilting Mounts Strike the Perfect Balance
A tilting TV mount often represents the “just right” option for many homeowners. It sits comfortably between the rigidity of a fixed mount and the comprehensive (and often costly) movement of a full-motion mount. You gain the crucial ability to eliminate glare and achieve optimal viewing from higher positions without the added expense, complexity, or wall protrusion of a full-motion system. If your primary need is vertical angle adjustment for comfort and glare reduction, and you don’t require extensive side-to-side swiveling, a tilting mount offers an incredibly practical, aesthetically pleasing, and cost-effective solution.
Preparing for Installation: Your Tilting TV Mount Checklist
Before you grab your tools and dive into mounting your TV, a little preparation goes a long way. Being organized will ensure a smooth, safe, and successful installation.
Essential Tools You’ll Need
Most tilting TV mounts come with clear instructions and some basic hardware, but you’ll want to have these common household tools on hand:
- Electric Drill: Essential for drilling pilot holes into studs.
- Phillips Head Screwdriver: For attaching brackets to your TV and tightening smaller screws.
- Tape Measure: For precise height and centering measurements.
- Level: Absolutely critical for ensuring your mount and TV are perfectly straight. Don’t skip this!
- Pencil: For marking stud locations and drill points.
- Drill Bit Set: You’ll need bits appropriate for pilot holes into wood studs (typically 3/16 inch) or concrete.
- Stud Finder: This is your best friend for locating the wooden studs behind your drywall, which are crucial for secure mounting.
- Socket Wrench or Adjustable Wrench: For tightening lag bolts securely.
- Hammer: Only needed if you’re installing into concrete or brick walls (for anchors).
Understanding Your TV: VESA and Weight Capacity
Before purchasing any mount, you must check your TV’s specifications.
- VESA Pattern: The Video Electronics Standards Association (VESA) created a standard for the mounting holes on the back of TVs. This pattern is expressed in millimeters (e.g., 400x400mm). You’ll find this in your TV’s manual or by measuring the distance between the holes yourself. Your tilting TV mount must be compatible with your TV’s VESA pattern.
- Weight Capacity: Every TV mount has a maximum weight it can safely support. It is absolutely crucial that your TV’s weight does not exceed this limit. While modern TVs are lighter, always double-check to ensure stability and safety.
Step-by-Step Installation: Mounting Your Tilting TV Mount Like a Pro
Now for the exciting part – getting that TV on the wall! Follow these steps carefully for a secure and perfectly positioned installation. if your TV is large or heavy, having a friend assist you for lifting is always a good idea.
Step 1: Attach Brackets to Your TV
Lay your TV face-down on a soft, clean surface (like a blanket on a table) to protect the screen. Locate the mounting holes on the back of your TV. Your mount kit will come with various screws; choose the ones that fit your TV’s threads perfectly. If your TV has an uneven back or you need space for cables, use the provided plastic spacers between the TV and the mounting brackets. Align the two vertical brackets (or arms) to the back of your TV and secure them with the appropriate screws and washers. Tighten them firmly, but be careful not to overtighten, which could damage your TV.
Step 2: Determine Optimal TV Height
This is where planning truly pays off. For most seated viewing, the center of your TV screen should be roughly at eye level. A common guideline is to aim for the TV’s center to be around 42 inches from the floor, but this can vary based on your seating height and personal preference. If mounting above a fireplace, ensure you can tilt the TV enough to comfortably view it without straining your neck. Use your tape measure to mark this desired center point on your wall.
Step 3: Locate and Mark Wall Studs
Using a reliable stud finder, scan the wall horizontally around your desired TV height to locate the wooden studs. These are typically spaced either 16 or 24 inches apart. Mark the center of at least two adjacent studs where your wall plate will be mounted. These studs provide the essential structural support for your TV’s weight. Never mount a TV directly into drywall without hitting studs, as it will not hold.
Step 4: Secure the Wall Plate
Hold the mount’s wall plate (the horizontal bar) against the wall, aligning its mounting holes with your stud markings. Use your level to ensure the wall plate is perfectly horizontal. Once aligned and leveled, use your pencil to mark the exact spots for drilling pilot holes through the wall plate’s designated openings into the center of the studs. Now, with your electric drill and the correct drill bit (usually 3/16 inch for wood studs), drill your pilot holes to the recommended depth. Finally, position the wall plate, insert the lag bolts with washers through the plate and into the pilot holes, and tighten them securely with a socket wrench. Ensure it’s snug and immovable, but avoid overtightening.
Step 5: Hang and Secure Your TV
This is usually a two-person job, especially for larger TVs. Carefully lift your TV, with the brackets already attached, and hook the top of the brackets onto the top edge of the wall plate. Once it’s hanging safely, gently lower the bottom of the TV until the brackets fully engage with the mount. Most tilting mounts have a locking mechanism, often safety screws or pull straps at the bottom of the brackets, that secure the TV to the wall plate. Refer to your mount’s manual for specific locking instructions and ensure your TV is firmly clicked into place and cannot be accidentally lifted off.
Step 6: Fine-Tune Your Tilt
With your TV securely mounted, it’s time to adjust the tilt. Tilting TV mounts typically have adjustment knobs or screws on the side or bottom of the brackets. Loosen these slightly, gently tilt your TV to your desired angle for optimal viewing (to reduce glare or align with your eye line), and then firmly tighten the knobs or screws to lock the tilt in place. Check the angle from different seating positions to ensure everyone gets a great view.
Beyond Installation: Cable Management and Aesthetics
A beautifully mounted TV can quickly lose its appeal if there’s a messy tangle of cables hanging down. Proper cable management is crucial for a clean, professional look and for building a truly integrated home entertainment system.
Hiding Those Pesky Wires
There are several effective ways to manage your cables:
- In-Wall Cable Management: Many tilting mounts feature large openings in the wall plate, allowing you to route cables directly behind the TV and down through the wall. This requires cutting access holes in your drywall and using specialized in-wall cable routing kits, ensuring power cables are handled safely in UL-approved conduits to avoid fire hazards.
- Cable Concealers/Raceways: If in-wall routing isn’t an option, external cable raceways can be painted to match your wall color, offering a neat and discreet way to hide wires.
- Cable Ties and Sleeves: For a less intrusive approach, use cable ties or fabric sleeves to bundle wires neatly behind the TV, minimizing their visibility. Always plan your cable routing before hanging the TV to ensure all connections are made and wires can be hidden effectively.
Achieving a Clean, Professional Look
Beyond cables, think about the overall aesthetic. Consider adding a small shelf below the TV for a soundbar or streaming device if you don’t want them hidden. Ensure your TV is centered visually on the wall space. These small details can make a significant difference in how integrated and polished your home entertainment area looks.
Troubleshooting Common Tilting TV Mount Issues
Even with careful installation, sometimes issues can arise. Here are some common problems with tilting TV mounts and how to fix them.
My TV is Tilting or Sagging!
If your TV starts to tilt or sag to one side after installation, don’t panic. The most common culprit is loose tilt adjustment screws or a faulty tilt mechanism. First, check the tilt adjustment knobs or screws on your mount and firmly tighten them. Some mounts also have additional support bolts that need to be engaged. If tightening doesn’t work, ensure the TV’s weight isn’t exceeding the mount’s capacity and that the wall plate is still securely fastened to the wall studs.
The Mount Feels Loose
A loose mount can be alarming and dangerous. This typically indicates that the lag bolts securing the wall plate to the studs have loosened, or that the mount wasn’t properly anchored into studs to begin with. Re-tighten all lag bolts on the wall plate. If the problem persists, you may need to re-evaluate your stud placement with a stud finder and ensure the mount is correctly anchored to at least two robust wall studs. If your wall seems structurally unsound, consider consulting a professional.
Uneven TV: What Went Wrong?
An uneven TV is usually a sign that the wall plate was not perfectly level during installation. While some tilting mounts offer post-installation leveling adjustments, the best fix is prevention. Always use a reliable level tool during Step 4. If your TV is slightly crooked, check if your mount has horizontal adjustment features or if you can loosen the TV brackets from the wall plate slightly, adjust, and re-tighten. For significant unevenness, you might need to detach the TV and re-level the wall plate.
Can’t Adjust the Tilt?
If your tilting mechanism seems stuck or won’t adjust, double-check that the tilt adjustment knobs or screws aren’t overtightened. Loosen them just enough to allow movement, adjust to your desired angle, and then re-tighten. Also, ensure no cables are snagged or obstructing the tilting mechanism behind the TV.
Frequently Asked Questions (FAQ)
What is the ideal tilt angle for a TV?
The ideal tilt angle for a TV depends heavily on its height relative to your eye level and the presence of glare. Generally, if your TV is mounted higher than eye level, a slight downward tilt of 5-15 degrees is recommended to provide a comfortable viewing angle and reduce neck strain. Experiment with different angles to find what feels most comfortable for your specific setup.
Can I install a tilting TV mount on drywall?
No, you should never install a tilting TV mount directly into drywall alone. Drywall cannot support the weight of a TV and mount safely. All TV mounts, including tilting ones, must be securely anchored into robust wooden wall studs using lag bolts, or into concrete/brick walls with appropriate anchors. Always use a stud finder to locate these structural supports.
How do I know if my TV is compatible with a tilting mount?
To check compatibility, you need to verify two main things: your TV’s VESA mounting pattern and its weight. Find the VESA dimensions (e.g., 200x200mm, 400x400mm) in your TV’s manual or by measuring the distance between the mounting holes on the back. Then, compare this to the VESA compatibility listed for the mount. Ensure your TV’s weight is within the maximum weight capacity specified by the mount manufacturer.
Do tilting mounts help with heat dissipation?
Yes, indirectly. Because tilting mounts create a small gap between the back of your TV and the wall (typically 1-3 inches), they allow for better airflow compared to fixed mounts that keep the TV almost flush. This improved ventilation can aid in heat dissipation, potentially prolonging the life of your television, especially for models known to run warmer.
How often should I check my TV mount’s stability?
It’s a good practice to periodically check your TV mount’s stability, perhaps once or twice a year, or after any significant household vibration. Gently try to move the TV to feel for any looseness. Check the tightness of all mounting bolts on the wall plate and the screws attaching the brackets to the TV. If you notice any wobbling, sagging, or hear creaking sounds, address the issue immediately.
Conclusion
A tilting TV mount is a smart, practical investment for enhancing your home entertainment setup. It delivers crucial glare reduction, ensures comfortable viewing angles for high-mounted TVs, and maintains a clean aesthetic, all while offering a balanced cost-to-flexibility ratio. By understanding its benefits and following proper installation techniques, you can confidently improve your living space and enjoy your favorite content in optimal comfort and style. Take the plunge, choose the right tilting TV mount for your needs, and enjoy the perfect view every single time. Your neck will thank you!
Frequently Asked Questions
What is the ideal tilt angle for a TV?
The ideal tilt angle for a TV depends on its height relative to your eye level and glare. For TVs mounted higher than eye level, a slight downward tilt of 5-15 degrees is generally recommended to ensure a comfortable viewing angle and reduce neck strain. Experiment with angles to find what works best for your specific setup.
Can I install a tilting TV mount on drywall?
No, you should never install a tilting TV mount directly into drywall alone. Drywall cannot safely support the weight of a TV and mount. All TV mounts, including tilting ones, must be securely anchored into robust wooden wall studs using lag bolts, or into concrete/brick walls with appropriate anchors. Always use a stud finder to locate these structural supports.
How do I know if my TV is compatible with a tilting mount?
To check compatibility, verify your TV's VESA mounting pattern and its weight. Find the VESA dimensions (e.g., 200x200mm, 400x400mm) in your TV's manual or by measuring the distance between the mounting holes. Ensure your TV's weight is within the maximum weight capacity specified by the mount manufacturer.
Do tilting mounts help with heat dissipation?
Yes, indirectly, tilting mounts can aid in heat dissipation. They create a small gap (typically 1-3 inches) between the back of your TV and the wall, allowing for better airflow compared to fixed mounts. This improved ventilation can potentially prolong the life of your television, especially for models that tend to run warmer.
How often should I check my TV mount's stability?
It's good practice to periodically check your TV mount's stability, ideally once or twice a year, or after any significant household vibration. Gently try to move the TV to feel for looseness. Check the tightness of all mounting bolts on the wall plate and the screws attaching the brackets to the TV. Address any wobbling, sagging, or creaking sounds immediately.
Install a Tilting TV Mount
Learn how to securely install a tilting TV mount to optimize your viewing experience and reduce glare.
Lay your TV face-down on a soft surface. Locate the mounting holes and secure the vertical brackets to the back of your TV using the appropriate screws and washers from your mount kit. Tighten firmly but avoid overtightening to prevent damage.
For most seated viewing, aim for the center of your TV screen to be around 42 inches from the floor, adjusting for your seating height. Mark this desired center point on your wall with a tape measure. Ensure you can comfortably view the TV without neck strain, especially if mounting above a fireplace.
Use a reliable stud finder to locate at least two adjacent wooden studs behind your drywall, typically 16 or 24 inches apart, around your desired TV height. Mark the center of these studs where your wall plate will be mounted. Never mount a TV directly into drywall without hitting studs, as it will not hold.
Hold the mount's wall plate against the wall, aligning its holes with your stud markings, and use a level to ensure it's perfectly horizontal. Mark drill points, then drill pilot holes into the studs with an electric drill and a 3/16 inch bit. Finally, secure the wall plate with lag bolts and washers, tightening them with a socket wrench until snug and immovable.
With assistance for larger TVs, carefully lift your TV (with brackets attached) and hook the top of the brackets onto the wall plate. Gently lower the TV until the brackets fully engage with the mount. Secure the TV to the wall plate using the mount's locking mechanism, such as safety screws or pull straps, as specified in your mount's manual.
Get our weekly buyer guide
Practical specs, not advice. Unsubscribe anytime.
This type of mount is a must-have for any serious home theater setup, especially if you have a projector screen or specific seating arrangements. I used one to mount my new 75-inch TV, and the ability to fine-tune the vertical angle makes a huge difference in picture quality and immersion. It’s a small investment for such a big improvement in comfort and viewing.
I bought a tilting TV mount for my kitchen TV, which is mounted pretty high. While the tilt does help with the viewing angle, I found that the specific model I got only offered about a 5-degree tilt, which isn’t quite enough for my setup. It’s better than nothing, but I was hoping for a bit more flexibility to really get rid of all the reflections. Next time I’ll pay closer attention to the exact tilt range.
I’ve been wanting to get a tilting mount for a while to help with the sun glare in my bedroom. This guide really helped me understand the different options. I ended up getting one that was on the higher end of the price range mentioned, and it feels super sturdy. The vertical adjustment is smooth, and it definitely improved my viewing experience. Wish I’d done it sooner!
I finally got around to installing a tilting TV mount in our living room, and it’s made a huge difference. Our TV is mounted a bit high over the fireplace, and the tilt feature totally eliminated the neck strain we used to get. The 15-degree range on the model I picked was perfect for getting rid of the glare from the window too. Installation was pretty straightforward, even for a DIY novice like me.