Welcome to Dikfu.com, your trusted source for all things TV mounting! With over 15 years in the field, I’ve seen firsthand how a well-installed Flat Panel Tv Wall Mount can transform a living space, turning a simple room into a sleek, modern entertainment hub. If you’re looking to reclaim floor space, achieve that cinematic look, or simply enhance your viewing experience, mounting your TV flat on the wall is an excellent choice. This guide will walk you through everything you need to know, from selecting the right mount to a confident, safe installation, ensuring your TV is perfectly positioned for years of enjoyment.
Why Choose a Flat Panel TV Wall Mount?
Opting for a flat panel TV wall mount goes beyond just aesthetics; it’s about optimizing your viewing experience, maximizing space, and ensuring safety.
- Space-Saving Elegance: A wall-mounted TV eliminates the need for bulky entertainment centers, freeing up valuable floor space and creating a minimalist, clutter-free environment. Your room instantly feels larger and more open.
- Optimized Viewing Angles: Depending on the type of mount, you can achieve the perfect viewing angle from almost anywhere in the room, reducing glare from windows or lights and preventing neck strain.
- Enhanced Safety: Securing your flat panel TV to the wall protects it from accidental bumps or toppling over, especially important in homes with children or pets. It offers peace of mind knowing your expensive investment is safely secured.
- Modern Aesthetics: Let’s be honest, a wall-mounted TV just looks good. It creates a focal point, giving your space a sophisticated, contemporary feel that elevates your entire home décor.
Understanding the Different Types of Flat Panel TV Wall Mounts
The world of flat panel TV wall mounts offers a variety of options, each designed to meet different needs and preferences. Choosing the right one is crucial for both functionality and aesthetics.
Fixed TV Mounts
Fixed mounts are the simplest and most cost-effective option. They hold your TV securely against the wall, often less than an inch away, for a truly sleek, low-profile look.
- Pros: Very slim profile, inexpensive, easy to install, secure.
- Cons: No adjustability (no tilt, swivel, or extension). Access to ports on the back of the TV can be challenging once installed.
- Best Use: Ideal for situations where your TV can be positioned at eye level and directly in front of your primary viewing area, without concerns about glare. Think dedicated media rooms or living rooms with controlled lighting.
|
Our Picks for the Best TV Mount in 2026
As an Amazon Associate I earn from qualifying purchases.
|
||
| Num | Product | Action |
|---|---|---|
| 1 | Perlegear Full Motion TV Wall Mount for Most 42–86 inch Flat Curved TVs up to 132 lbs, 12″/16″ Wood Studs, Bracket with Articulating Arms, Swivel, Tool-Free Tilt, Max VESA 600x400mm PGLF12 |

|
| 2 | USX MOUNT Full Motion TV Wall Mount for Most 32-70 inch TVs up to 99 lbs, Wall Mount Bracket with Dual Articulating Arms, Swivel, Tilt, Max VESA 400x400mm, TV Mount Fits 12”/16” Wood Studs |
|
| 3 | Amazon Basics Full Motion Articulating TV Wall Mount, with Swivel and Tilt, for 26\" to 55\" TVs and Flat Panels up to 80 Lbs, VESA Compatible, Black |
|
| 4 | Mounting Dream TV Wall Mount for 32-65 Inch Television,Mount with Swivel and Tilt, Full Motion Bracket with Articulating Dual Arms, Fits 16inch Studs, Max VESA 400X400 mm, 99lbs, MD2380 |
|
| 5 | USX Mount Full Motion TV Wall Mount for Most 42-90 inch Flat Screen/LED/4K, TV Mount Bracket Dual Swivel Articulating Tilt 6 Arms, Max 16\" Wood Studs, VESA 600x400mm, Holds up to 132lbs |
|
| 6 | MOUNTUP Full Motion TV Wall Mount for Most 26-60 Inch TVs, Max VESA 400x400mm Wall Mount TV Bracket with Swivel Tilting Extension Level Adjustment for LED LCD Flat Curved TVs Up to 77 LBS, MU0018 |
|
| 7 | Mounting Dream TV Wall Mount for Most 37-75 Inch TVs, Universal Tilt TV Mount Fit 16\", 18\", 24\" Stud with Loading Capacity 132lbs, Max Vesa 600 x 400mm, Low Profile Flat Wall Mount TV Bracket |
|
| 8 | monTEK Motorized Ceiling TV Mount for 43-86 Inch TVs, Heavy-Duty 121lbs (4X Load Tested), Off-Center VESA Compatible, Electric Flip Down with Remote/App/Voice Control, Fits Flat & Pitched Roof |
|
| 9 | Magnetic Monitor Wall Mount for Steel Surfaces, Fits 13 to 34 Inch Screens, Holds up to 22 lbs, VESA 75/100 Compatible Wall Mount for Computer and TV Monitor, No-Drill Installation with All Screws |
|
| 10 | Pipishell Full Motion TV Wall Mount for Echo Show 21/15 and 13-43 Inch Flat Curved Screen TVs & Monitors, Max VESA 200x200mm up to 44lbs, TV Mount Wall Bracket with Rotation Swivel Tilt Extension |
|
Tilting TV Mounts
Tilting mounts allow you to adjust your TV’s vertical angle, typically between 5 to 15 degrees up or down. This is particularly useful for reducing glare or improving viewing comfort if your TV is mounted higher than eye level.
- Pros: Reduces glare, improves viewing comfort when mounted high (e.g., above a fireplace), relatively low profile (usually extending 2-3.5 inches from the wall).
- Cons: No horizontal (side-to-side) movement or extension.
- Best Use: Perfect for bedrooms where you might watch TV from bed, or living rooms where the TV is above a fireplace.
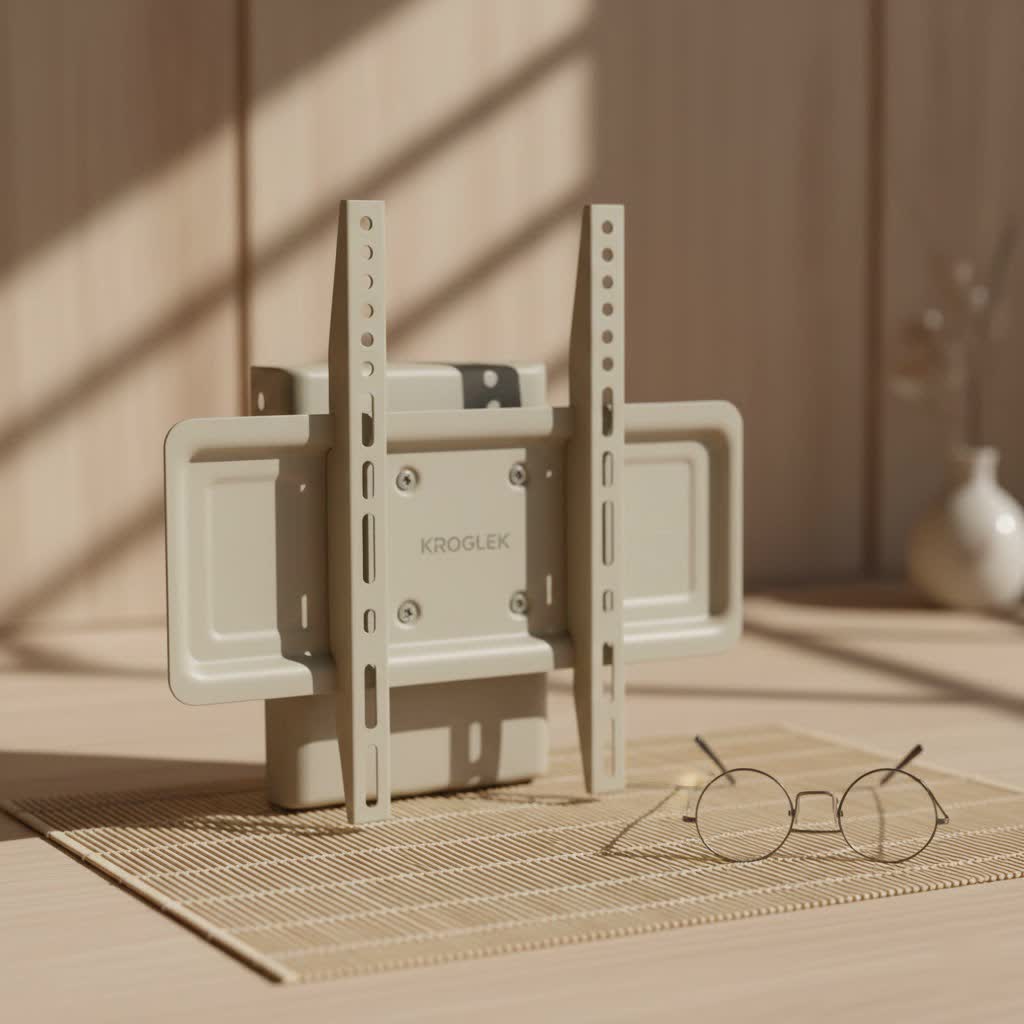
Full-Motion (Articulating) TV Mounts
Often referred to as articulating mounts, full-motion mounts offer the greatest flexibility. They allow you to extend the TV away from the wall, tilt it up or down, and swivel it side-to-side, sometimes up to 180 degrees.
- Pros: Maximum viewing flexibility, can adjust for various seating arrangements or glare sources, easy access to ports behind the TV, suitable for corner mounting.
- Cons: More expensive, larger profile when extended, can be more complex to install, and require careful cable planning.
- Best Use: Excellent for open-concept living spaces, kitchens, or rooms with multiple viewing areas where you need to adjust the TV frequently.
“Choosing the right flat panel TV wall mount is like selecting the perfect frame for a masterpiece. It’s not just about holding the TV; it’s about enhancing its presentation and your interaction with it,” says Alex “The Mount Master” Chen, Lead Installation Specialist at Dikfu.com.
How to Select the Perfect Flat Panel TV Wall Mount
Selecting the ideal flat panel TV wall mount involves more than just picking one that looks good. You need to consider several technical specifications and your personal viewing habits to ensure compatibility and satisfaction.
TV Size and Weight Compatibility (VESA Standards)
This is paramount for safety. Every flat panel TV wall mount has a specified weight capacity and screen size range it can support.
- Weight Capacity: Always choose a mount rated for your TV’s weight, ideally with a margin of safety. Never exceed the stated maximum weight.
- VESA Pattern: VESA (Video Electronics Standards Association) is a set of standards for mounting interfaces. You’ll find four screw holes on the back of your TV. Measure the horizontal and vertical distance between these holes (in millimeters) to determine your TV’s VESA pattern (e.g., 200x200mm, 400x400mm). Your mount must match or be compatible with your TV’s VESA pattern. Most mount packaging lists the supported VESA patterns.
Wall Type
The type of wall you have dictates the appropriate mounting hardware and installation technique.
- Wood Studs: Most common in homes, wood studs provide a strong anchor point. You’ll use lag bolts to secure the mount directly into the center of the studs. Studs are typically 16 or 24 inches apart.
- Concrete/Brick: These solid walls offer excellent support. You’ll need a hammer drill and masonry anchors specifically designed for concrete or brick.
- Drywall (without studs): Mounting directly into drywall without hitting a stud is generally not recommended for heavy flat panel TVs. However, specialized heavy-duty drywall anchors (like toggle bolts or butterfly anchors) can be used for lighter TVs, but always check the weight rating carefully. For larger TVs, aim for studs or use a studless mount designed for high weight capacities if available and appropriate for your TV’s weight.
Viewing Needs and Room Layout
Consider how and where you watch TV.
- Will you always be sitting in the same spot, or do you need flexibility to watch from different angles (e.g., kitchen and living room)?
- Is there a lot of natural light that could cause glare?
- How high do you want the TV? The ideal height usually places the center of the screen at eye level when seated. For a typical living room, a 42-inch TV is often hung around 56 inches from the floor, while a 70-inch TV might be around 67 inches.
Cable Management and Aesthetics
Loose wires can quickly ruin the clean look of a wall-mounted TV.
- Look for mounts with integrated cable management channels or clips.
- Consider in-wall cable routing kits for a completely hidden wire solution. This usually involves cutting holes in your drywall and feeding cables through, which can be a DIY project or require professional help.
- On-wall cable covers can also be painted to match your wall for a less noticeable finish.
Step-by-Step Installation Guide for Your Flat Panel TV Wall Mount
Installing a flat panel TV wall mount can seem daunting, but with the right tools and a systematic approach, it’s a manageable DIY project. Always read your mount’s specific instruction manual, as details can vary.
Tools and Materials You’ll Need
Before you begin, gather these essentials:
- Flat panel TV wall mount kit: Ensure it includes all necessary hardware for your wall type.
- Stud finder: Essential for locating wood or metal studs.
- Pencil: For marking measurements.
- Measuring tape: For accurate positioning.
- Level (spirit level): Crucial for ensuring a perfectly straight installation.
- Electric drill with appropriate drill bits: For pilot holes into studs or masonry.
- Socket wrench set/Screwdriver: To tighten lag bolts and other fasteners.
- Safety glasses: Always protect your eyes.
- A friend: Highly recommended for lifting and positioning larger TVs.
Locating Studs and Marking Drill Points
This is arguably the most critical step for a secure installation.
- Determine TV Height: Decide on the ideal viewing height. A good starting point is to have the center of the screen at eye level when you are seated. Mark this point lightly with a pencil.
- Find the Studs: Use your stud finder to locate the vertical wooden or metal studs behind your drywall. Scan horizontally across the wall in the area where your TV will be mounted. Mark both edges of each stud you find. Most mounts require securing into at least two studs for stability.
- Verify Studs: To be absolutely sure, you can gently tap a small finish nail into the center of your marked stud locations. You’ll feel solid resistance if it’s a stud.
- Position the Wall Plate: Hold the mount’s wall plate against the wall, aligning it with your desired TV height and centered over the studs you’ve located. Use your level to ensure it’s perfectly horizontal. Mark the drill holes directly through the mount’s plate onto the wall.
Drilling Pilot Holes and Attaching the Mount Bracket
Precision here ensures a solid and safe connection.
- Drill Pilot Holes: Using the appropriate drill bit size (as specified in your mount’s manual, typically smaller than the lag bolt diameter), carefully drill pilot holes into the center of your marked stud locations. For concrete or brick, use a hammer drill and masonry bit.
- Attach Wall Plate: Position the wall plate over the drilled holes. Insert the lag bolts (for wood studs) or masonry anchors and bolts (for concrete/brick) through the plate and into the wall.
- Tighten Securely: Use a socket wrench to tighten all bolts firmly. Do not overtighten, as this can strip the wood or damage the wall. Once tightened, give the mount a firm tug to ensure it is absolutely secure. Double-check with your level.
Securing the TV to the Mount and Final Adjustments
You’re almost there!
- Attach TV Brackets: Lay your flat panel TV face down on a soft, clean surface. Locate the VESA mounting holes on the back. Attach the vertical brackets (usually two) from your mount kit to the back of your TV using the screws provided. Make sure they are secure and tight.
- Lift and Hang: With the help of your friend, carefully lift the TV and hook the attached brackets onto the wall plate. Most mounts have a locking mechanism or safety screws to prevent the TV from accidentally lifting off the wall plate. Engage these mechanisms.
- Connect Cables: Now is the time to connect all your cables (HDMI, power, optical, etc.).
- Final Adjustments: For tilting or full-motion mounts, adjust the tilt and swivel to your preferred viewing angle. Ensure everything is level and locked in place.
Mastering Cable Management and Enhancing Your Entertainment Space
The installation isn’t truly complete until those unsightly cables are dealt with.
- In-Wall Concealment: For the cleanest look, run your cables inside the wall. This involves cutting access holes behind the TV and near your media console. Use low-voltage cable pass-through plates for a finished look.
- On-Wall Solutions: If in-wall routing isn’t feasible, use paintable cable raceways or channels. These stick to your wall and can be painted to blend in seamlessly.
- Velcro Ties and Sleeves: Group cables together neatly behind the TV using Velcro ties or cable sleeves to prevent a tangled mess.
- Accessorize Smartly: Consider floating shelves beneath your TV for soundbars, streaming devices, or decorative items, further enhancing the clean, organized look of your mounted flat panel TV.
Common Flat Panel TV Wall Mount Installation Mistakes and How to Avoid Them
Even seasoned DIYers can make mistakes. Being aware of these common pitfalls can save you time, frustration, and potential damage.
- Not Checking Wall Type or Locating Studs Properly: Installing a heavy TV into drywall without proper anchors or into a weak section of a stud is a recipe for disaster. Always use a reliable stud finder and verify stud locations.
- Ignoring Weight Limits and VESA Compatibility: Using a flat panel TV wall mount that isn’t rated for your TV’s weight or doesn’t match its VESA pattern is a critical error. Double-check these specifications before purchasing and installing.
- Using Incorrect Screw Lengths: When attaching brackets to the back of the TV, using screws that are too long can damage internal components, while screws that are too short won’t provide adequate grip. Your mount kit should include various lengths; choose wisely based on your TV’s depth.
- Poor Leveling: A crooked TV is an eyesore. Use a high-quality level multiple times throughout the installation process – when marking holes, attaching the wall plate, and for final adjustments.
- Leaving Cables Exposed: This negates the aesthetic benefits of wall mounting. Plan your cable management strategy from the outset.
Frequently Asked Questions About Flat Panel TV Wall Mounts
Can I install a flat panel TV mount on drywall without studs?
While possible for very light TVs using specialized heavy-duty drywall anchors (like toggle bolts), it is generally not recommended for most flat panel TVs, especially larger, heavier models. Always prioritize securing your flat panel TV wall mount into wood or metal studs for maximum safety and stability.
What is VESA, and why is it important for TV mounts?
VESA refers to the Video Electronics Standards Association, which sets standards for the mounting holes on the back of flat panel TVs. It’s crucial because your flat panel TV wall mount must have a VESA pattern that matches or is compatible with your TV’s pattern to ensure a secure fit.
How high should I mount my flat panel TV?
The ideal height for your flat panel TV typically places the center of the screen at eye level when you are seated in your primary viewing position. For a general guideline, a 42-inch TV is often mounted with its center around 56 inches from the floor, while a 70-inch TV might be closer to 67 inches.
Do all flat panel TV mounts come with all the necessary hardware?
Most flat panel TV wall mount kits include a variety of screws, washers, and spacers to fit different TV models and some basic hardware for wood stud installation. However, you might need to purchase specific anchors (e.g., for concrete/brick or heavy-duty drywall) separately, depending on your wall type.
How do I remove a TV from a wall mount?
The process varies slightly by mount type. Generally, you’ll need to locate and release any safety screws or locking mechanisms that secure the TV to the wall plate. Then, with the help of a second person, carefully lift the TV off the wall plate.
What’s the difference between a tilting and a full-motion mount?
A tilting flat panel TV wall mount allows for vertical angle adjustments (up and down) to reduce glare or improve viewing from a higher mounting position. A full-motion (articulating) mount offers greater flexibility, allowing you to extend the TV away from the wall, tilt it vertically, and swivel it horizontally (side-to-side) for versatile viewing angles.
Conclusion
Mounting your flat panel TV on the wall is one of the most impactful upgrades you can make to your home entertainment system. It’s a project that brings immediate benefits: a cleaner aesthetic, more usable space, and a superior viewing experience. By carefully considering the type of flat panel TV wall mount that suits your needs, understanding the installation process, and taking precautions against common mistakes, you can achieve a professional-looking result with confidence. At Dikfu.com, we believe that empowering you with expert knowledge leads to smarter, safer, and more enjoyable home setups. So, go ahead, take the plunge, and elevate your viewing experience with a perfectly installed flat panel TV wall mount!