Thinking about installing a TV wall mount to transform your living space? You’re in for a treat! A wall-mounted TV creates a sleek, modern aesthetic, frees up valuable floor space, and can dramatically improve your viewing experience. But before you dive in, knowing the ins and outs of securely mounting your TV is key. As a seasoned expert with over 15 years in the field and content creator for Dikfu.com, I’m here to guide you through every step, ensuring your DIY project is a resounding success.
Getting your TV up on the wall isn’t just about drilling holes; it’s about understanding the mechanics, choosing the right hardware, and ensuring long-term safety. Let’s break down everything you need to know about installing a TV wall mount, from selecting the perfect bracket to hiding those pesky cables.
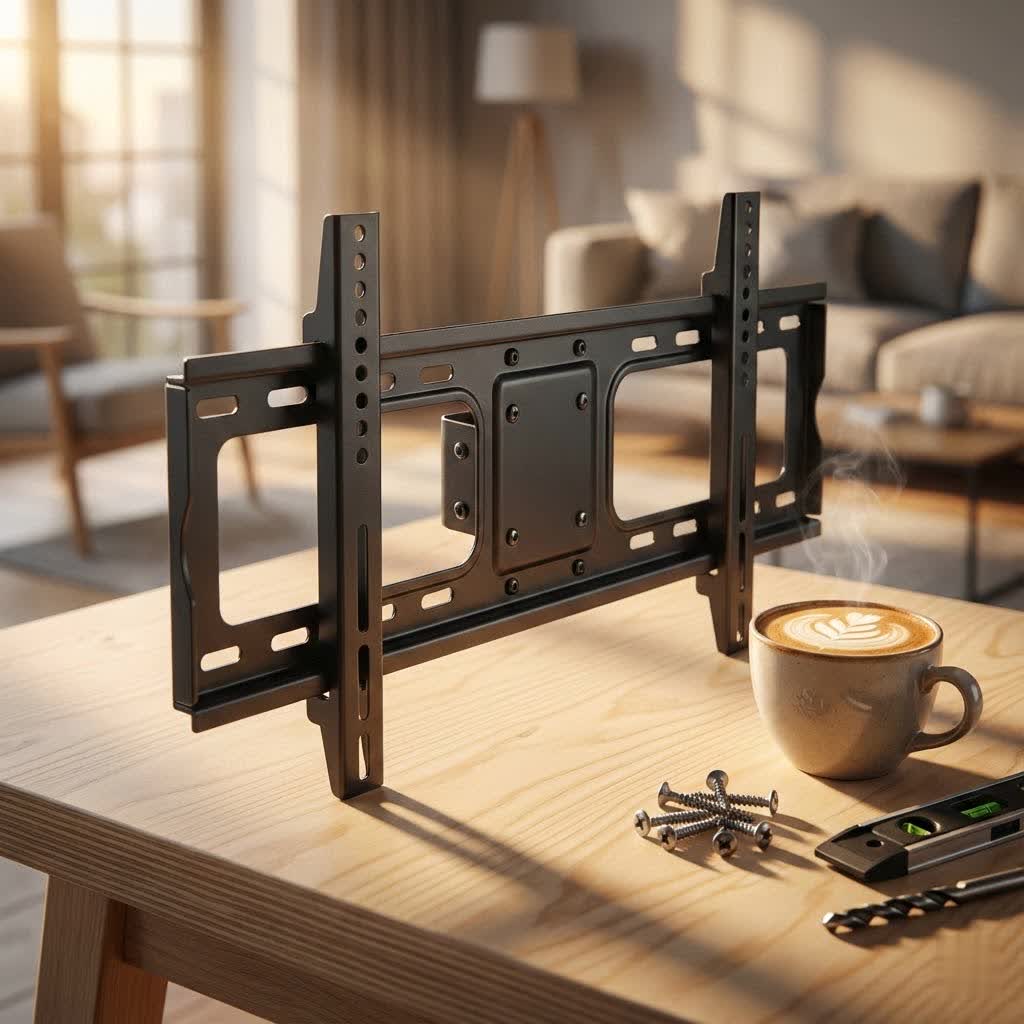
Understanding the Different Types of TV Wall Mounts
|
Our Picks for the Best TV Mount in 2026
As an Amazon Associate I earn from qualifying purchases.
|
||
| Num | Product | Action |
|---|---|---|
| 1 | Amazon Basics Full Motion Articulating TV Wall Mount, with Swivel and Tilt, for 26\" to 55\" TVs and Flat Panels up to 80 Lbs, VESA Compatible, Black |

|
| 2 | Magnetic Monitor Wall Mount for Steel Surfaces, Fits 13 to 34 Inch Screens, Holds up to 22 lbs, VESA 75/100 Compatible Wall Mount for Computer and TV Monitor, No-Drill Installation with All Screws |
|
| 3 | monTEK Motorized Ceiling TV Mount for 43-86 Inch TVs, Heavy-Duty 121lbs (4X Load Tested), Off-Center VESA Compatible, Electric Flip Down with Remote/App/Voice Control, Fits Flat & Pitched Roof |
|
| 4 | Mounting Dream TV Wall Mount for 32-65 Inch Television,Mount with Swivel and Tilt, Full Motion Bracket with Articulating Dual Arms, Fits 16inch Studs, Max VESA 400X400 mm, 99lbs, MD2380 |
|
| 5 | Pipishell Full Motion TV Wall Mount for Echo Show 21/15 and 13-43 Inch Flat Curved Screen TVs & Monitors, Max VESA 200x200mm up to 44lbs, TV Mount Wall Bracket with Rotation Swivel Tilt Extension |
|
| 6 | MOUNTUP Full Motion TV Wall Mount for Most 26-60 Inch TVs, Max VESA 400x400mm Wall Mount TV Bracket with Swivel Tilting Extension Level Adjustment for LED LCD Flat Curved TVs Up to 77 LBS, MU0018 |
|
| 7 | USX Mount Full Motion TV Wall Mount for Most 42-90 inch Flat Screen/LED/4K, TV Mount Bracket Dual Swivel Articulating Tilt 6 Arms, Max 16\" Wood Studs, VESA 600x400mm, Holds up to 132lbs |
|
| 8 | Perlegear Full Motion TV Wall Mount for Most 42–86 inch Flat Curved TVs up to 132 lbs, 12″/16″ Wood Studs, Bracket with Articulating Arms, Swivel, Tool-Free Tilt, Max VESA 600x400mm PGLF12 |
|
| 9 | USX MOUNT Full Motion TV Wall Mount for Most 32-70 inch TVs up to 99 lbs, Wall Mount Bracket with Dual Articulating Arms, Swivel, Tilt, Max VESA 400x400mm, TV Mount Fits 12”/16” Wood Studs |
|
| 10 | Mounting Dream TV Wall Mount for Most 37-75 Inch TVs, Universal Tilt TV Mount Fit 16\", 18\", 24\" Stud with Loading Capacity 132lbs, Max Vesa 600 x 400mm, Low Profile Flat Wall Mount TV Bracket |
|
The world of TV mounts offers a variety of options, each designed for different needs and room layouts. Choosing the right one is the first critical step in your installing a TV wall mount journey.
Fixed Mounts: The Minimalist’s Choice
Fixed mounts are the simplest and most budget-friendly option. They hold your TV close to the wall, like a framed piece of art, offering a super low-profile look. This type is perfect if you have a dedicated viewing area where glare isn’t an issue and you don’t need to adjust the screen angle. They are incredibly stable and ideal for a clean, static setup.
Tilting Mounts: Battling Glare and High Placement
If your TV needs to be mounted higher on the wall, say above a fireplace, or if you often battle screen glare from windows or lights, a tilting mount is your best friend. These mounts allow you to adjust the vertical angle, usually downwards, helping to reduce glare and improve the viewing angle for those seated below. They offer more flexibility than fixed mounts while still maintaining a relatively close profile to the wall.
Full-Motion (Articulating) Mounts: Ultimate Flexibility
For those who crave versatility, full-motion mounts—also known as articulating mounts—are the ultimate solution. These mounts extend, tilt, and swivel in multiple directions, allowing you to pull the TV away from the wall, turn it towards different seating areas, or angle it to avoid glare. They’re fantastic for open-concept rooms, corner installations, or multi-purpose spaces where the viewing angle changes frequently. While they offer the most flexibility, they typically protrude further from the wall and can be more complex to install.
Swivel Mounts: Horizontal Adjustments
Swivel mounts are similar to fixed mounts but come with an extended arm that lets you move your TV horizontally. Some even combine a tilt function. These are great for rooms where you might want to angle your TV between two different viewing areas, like a kitchen prep area and a breakfast bar.
Choosing the Perfect Mount for Your TV: Size, Weight, and VESA
Selecting the correct mount is paramount for both safety and functionality. It’s not just about finding “a” mount; it’s about finding “the right” mount for your specific television and wall.
The Crucial VESA Compatibility
The Video Electronics Standards Association (VESA) created a universal standard for mounting holes on the back of TVs. This “VESA pattern” is displayed as two numbers (e.g., 400x400mm), indicating the horizontal and vertical distance between the mounting holes in millimeters.
- How to find your VESA pattern: Check your TV’s user manual, the manufacturer’s website, or simply measure the distance between the centers of the four mounting holes on the back of your TV (horizontal x vertical).
- Why it matters: Your chosen mount must be compatible with your TV’s VESA pattern. An incompatible mount won’t fit, leading to frustration and potential damage.
TV Weight and Size: Don’t Overlook Capacity
Every TV mount has a specified weight capacity and screen size range it can safely support. Installing a TV wall mount that’s too small or weak for your television is a recipe for disaster. Always ensure your mount can comfortably handle your TV’s weight. “Never compromise on the mount’s weight capacity,” advises Dikfu’s lead installation specialist, Liam O’Connell. “It’s the single most critical factor for a secure installation.” While most mounts are tested to withstand several times their stated capacity, pushing those limits is an unnecessary risk.
Wall Material: The Foundation of Security
The type of wall you’re mounting on dictates the hardware and technique required.
- Wood Stud Walls: These are the most common and ideal. You must secure the mount into the wooden studs, not just the drywall. Drywall alone cannot support the weight of a TV. A stud finder is essential here.
- Brick or Concrete Walls: These sturdy walls can hold heavy TVs but require a hammer drill, carbide drill bits, and specific heavy-duty masonry anchors. When drilling into brick, aim for the brick itself, not the mortar, which is less secure.
- Metal Stud Walls: Less common in residential homes, these require specialized metal stud anchors. It’s often best to consult a professional for metal stud installations.
Essential Tools and Safety First
Before you start installing a TV wall mount, gathering the right tools and prioritizing safety are non-negotiable.
Tools You’ll Need:
- TV Wall Mount Kit: Ensure it includes all necessary hardware (screws, spacers, washers).
- Stud Finder: Absolutely essential for wood stud walls. Magnetic stud finders can help with lath and plaster walls.
- Level: A long level (24-48 inches) is ideal for ensuring your mount is perfectly straight. No one wants a crooked TV!
- Power Drill: With appropriate drill bits for pilot holes (wood or masonry).
- Measuring Tape: For precise placement.
- Pencil: For marking drill points.
- Phillips Head Screwdriver/Socket Wrench: For tightening mount screws.
- Safety Glasses and Gloves: Always protect your eyes and hands.
- Helper: A second pair of hands is invaluable, especially when lifting the TV.
Safety Precautions: Your Top Priority
- Two-Person Lift: TVs, even smaller ones, can be awkward and heavy. Always have a helper when lifting and hanging the TV to prevent injury or damage.
- Check for Obstructions: Before drilling, be aware of hidden electrical wiring, plumbing, or gas lines. Use a stud finder that also detects live wires.
- Test Stability: After attaching the wall bracket but before hanging the TV, give the mount a gentle tug to ensure it’s firmly secured. Once the TV is on, carefully check its stability before letting go.
- Read Instructions: Every mount is slightly different. Always read the manufacturer’s installation instructions thoroughly.
Step-by-Step Guide to Installing Your TV Wall Mount
Let’s get down to business! Here’s a comprehensive guide to installing a TV wall mount safely and efficiently.
Step 1: Plan Your Perfect Location
This is more than just picking a spot; it’s about optimizing your viewing experience.
- Ideal Height: The center of your TV screen should generally be at eye level when you’re seated. For most people, this is about 42-48 inches from the floor to the center of the screen. If mounting above a fireplace, a tilting mount can help mitigate the higher angle.
- Avoid Glare: Position your TV away from direct sunlight or strong light sources that could cause reflections. If unavoidable, a full-motion or tilting mount can help you adjust the angle.
- Proximity to Outlets: Ensure easy access to power outlets and other media connections. Plan for cable management from the start.
Step 2: Locate Wall Studs (or Plan for Alternative Walls)
For stud walls, use your stud finder to locate the center of at least two adjacent studs where your mount will sit. Mark these spots clearly with a pencil. Most TV mounts are designed to span two studs for maximum support. If you’re dealing with brick or concrete, you’ll drill directly into the masonry at your marked points.
Step 3: Attach the Wall Bracket
Hold the wall bracket against the wall at your desired height and location. Use your level to ensure it’s perfectly horizontal. Mark the drill points for the pilot holes, making sure they align with the center of your studs.
- Drill Pilot Holes: Use the appropriate drill bit (smaller than your lag screws) to drill pilot holes into the marked stud centers. For masonry, use a hammer drill and carbide bit, inserting the correct anchors.
- Secure the Bracket: Align the wall bracket with the pilot holes and secure it firmly with the lag screws and washers provided in your mount kit. Tighten them securely, but avoid overtightening, which can strip the wood or damage the wall. After it’s secure, test its stability with a gentle tug.
Step 4: Attach the Mounting Plate (or Arms) to Your TV
Carefully lay your TV face-down on a soft, clean surface (a blanket on a table or carpet works great) to protect the screen.
- Align and Attach: Locate the VESA mounting holes on the back of your TV. Align the mounting plate or arms (depending on your mount type) with these holes.
- Use Correct Hardware: Use the screws, washers, and spacers provided with your TV mount kit. The spacers are often necessary to ensure the mount doesn’t block input ports or to create a flat surface if your TV back isn’t completely flat.
Step 5: Hang the TV on the Wall Bracket
This is where your helper comes in!
- Lift Together: With your helper, carefully lift the TV, aligning the mounting plate/arms on the TV with the wall bracket.
- Hook and Lock: Gently hook or slide the TV onto the wall bracket according to your mount’s specific instructions. Most mounts have a locking mechanism (screws, clips, or pull-straps) to secure the TV in place. Engage these mechanisms immediately.
- Check Security: Once hooked, do not let go until you’ve double-checked that the TV is securely seated and locked. Give it a gentle shake to confirm stability.
Step 6: Final Checks and Adjustments
- Level Check: Use your level again to ensure the TV is perfectly horizontal. Most mounts allow for minor adjustments post-installation.
- Functionality: Turn on your TV, connect all devices, and test audio/video to ensure everything is working correctly.
- Viewing Angle: For tilting or full-motion mounts, adjust the tilt and swivel to your preferred viewing angle.
Mastering Cable Management: A Clean Finish
Unsightly dangling cables can spoil the sleek look of your wall-mounted TV. Here are some effective solutions:
In-Wall Cable Management
This is the cleanest option, but it requires a bit more effort.
- In-Wall Kits: These kits include a low-voltage pass-through system or conduit that allows you to safely route cables inside your wall, from behind the TV down to an outlet or media console below. Some kits even integrate power outlets.
- Professional Help: If you’re uncomfortable cutting into your drywall or dealing with electrical work, consider hiring a professional for in-wall cable concealment.
On-Wall Cable Management
If cutting into your wall isn’t an option, these solutions work wonders:
- Cable Raceways/Cord Covers: These are flat, paintable channels that adhere to your wall, concealing cables neatly. They come in various lengths and colors, and you can paint them to match your wall for a seamless look.
- Velcro Straps and Cable Ties: For a quick and easy fix, bundle cables together using Velcro straps or reusable cable ties behind the TV or along the mount arm. This reduces clutter and makes them easier to manage.
- Shorter Cables: Sometimes, the simplest solution is to buy shorter HDMI, power, and audio cables to minimize excess length.
Common Mistakes to Avoid When Installing a TV Wall Mount
Even with the best intentions, small oversights can lead to big problems. Avoid these common blunders:
- Ignoring Wall Type: Never mount a TV on drywall alone. Always locate and secure into studs, brick, or concrete.
- Incorrect Mount for TV Specifications: Using a mount that doesn’t match your TV’s VESA pattern, weight, or size capacity is a serious safety risk.
- Mounting Too High or Too Low: An improperly placed TV can cause neck strain and an uncomfortable viewing experience. Aim for eye level when seated.
- Forgetting Cable Access: Before fully installing, check that the mount won’t block any input ports on your TV. Use spacers if needed.
- Skipping a Dry Run: Doing a practice assembly of the mount and TV on the floor can help you anticipate challenges and understand the process before working on the wall.
- Not Using the Right Tools: Don’t attempt to force screws with the wrong screwdriver or drill. Having the correct tools makes the job safer and easier.
Frequently Asked Questions
Can I install a TV mount on drywall without studs?
No, it’s generally not recommended to mount a TV directly onto drywall without securing it into studs or using specialized heavy-duty anchors for other solid wall types. Drywall simply isn’t strong enough to safely support the weight of most televisions, which can lead to the TV falling and causing significant damage or injury.
How high should I mount my TV?
The ideal height for mounting a TV is typically at eye level when you are seated. This usually means the center of the TV screen should be about 42 to 48 inches from the floor. However, this can vary based on your seating arrangement and personal preference.
What is VESA, and why is it important for installing a TV wall mount?
VESA stands for Video Electronics Standards Association. It’s a universal standard for the mounting hole patterns on the back of TVs. These measurements (e.g., 400x400mm) indicate the exact distance between the mounting holes. It’s crucial because your TV mount must match your TV’s VESA pattern to ensure compatibility and a secure fit.
How can I hide cables after installing a TV wall mount?
You have several options: use in-wall cable management kits (conduits or brush plates) for the cleanest look, employ on-wall raceways or cord covers that can be painted to match your wall, or simply bundle cables together with Velcro straps behind the TV. Using shorter cables or strategically placing furniture can also help.
The Dikfu Difference: Empowering Your DIY Journey
Installing a TV wall mount might seem daunting at first, but with the right knowledge, tools, and a little patience, it’s a perfectly achievable DIY project. You’ll not only enhance your home’s aesthetics but also enjoy a superior viewing experience. By following these guidelines from Dikfu.com, you can approach your TV mounting project with confidence, knowing you’re building a safe, secure, and stylish entertainment hub. Get ready to elevate your home entertainment and enjoy that beautifully mounted TV!