Installing a TV wall mount bracket significantly enhances viewing angles, saves space, and creates an immersive home cinema experience. The process involves selecting the correct mount type (fixed, tilting, or full-motion) based on your TV’s size and weight, VESA compatibility, and wall type, followed by a precise installation into wall studs using essential tools like a stud finder and level. Proper cable management and optimal TV height are also crucial for a polished, safe setup.
As a seasoned expert with over 15 years in TV mount installations and the lead content creator for Dikfu.com, I’m here to demystify the process. We’ll cover everything from selecting the perfect mount for your specific TV and wall type to a professional step-by-step installation guide, clever cable management, and how to troubleshoot common issues. By the end, you’ll be confident in transforming your viewing space safely and efficiently. For shop curated tv mounts on this site.
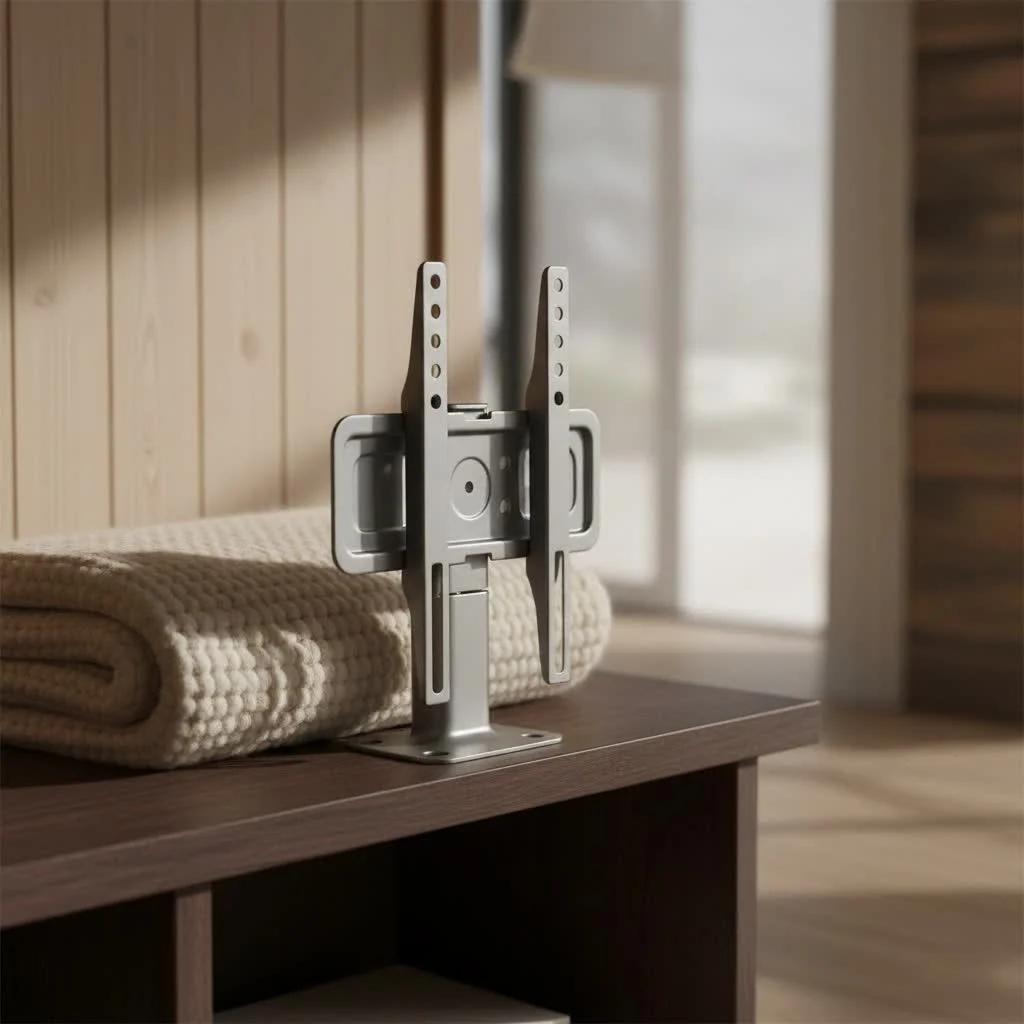
Unpacking the World of TV Wall Mount Brackets
Not all TV wall mounts are created equal, and understanding their differences is the first step to making an informed decision. Each type offers unique benefits tailored to different viewing preferences and room layouts.
Fixed TV Mount Brackets: The Sleek & Minimalist Choice
Fixed mounts, also known as low-profile or flat mounts, are the simplest and most budget-friendly option. They hold your TV securely and snugly against the wall, creating a clean, picture-frame-like look.
- Pros: Low profile, very secure once installed, generally the most affordable. Ideal for rooms where the TV is viewed head-on at eye level and glare isn’t a major issue.
- Cons: No adjustability (cannot tilt, swivel, or extend). Access to rear ports can be challenging, so plan your connections before mounting.
Tilting TV Mount Brackets: Conquer Glare, Enhance Comfort
Tilting mounts offer a step up in flexibility from fixed mounts. They allow you to adjust the vertical angle of your TV, typically offering a downward tilt.
- Pros: Reduces glare from windows or overhead lighting, improves viewing comfort if your TV is mounted higher than eye level (e.g., above a fireplace), and still maintains a relatively low profile.
- Cons: Only offers vertical tilt; no side-to-side swivel or extension from the wall.
Full-Motion (Articulating/Swivel) TV Mount Brackets: Ultimate Flexibility
Also known as articulating or swivel mounts, full-motion brackets offer the most versatility. They allow you to pull the TV away from the wall, swivel it left and right, and tilt it up or down.
- Pros: Maximum flexibility for multiple viewing angles, ideal for large open-plan rooms or corners, helps eliminate glare from various light sources, and provides easy access to rear TV ports for connecting cables.
- Cons: More expensive and generally more complex to install due to moving parts. They can also appear bulkier than fixed or tilting mounts when extended.
Specialized Mounts: Beyond the Basics
|
Our Picks for the Best TV Mount in 2026
As an Amazon Associate I earn from qualifying purchases.
|
||
| Num | Product | Action |
|---|---|---|
| 1 | Magnetic Monitor Wall Mount for Steel Surfaces, Fits 13 to 34 Inch Screens, Holds up to 22 lbs, VESA 75/100 Compatible Wall Mount for Computer and TV Monitor, No-Drill Installation with All Screws |

|
| 2 | Mounting Dream TV Wall Mount for 32-65 Inch Television,Mount with Swivel and Tilt, Full Motion Bracket with Articulating Dual Arms, Fits 16inch Studs, Max VESA 400X400 mm, 99lbs, MD2380 |
|
| 3 | USX MOUNT Full Motion TV Wall Mount for Most 32-70 inch TVs up to 99 lbs, Wall Mount Bracket with Dual Articulating Arms, Swivel, Tilt, Max VESA 400x400mm, TV Mount Fits 12”/16” Wood Studs |
|
| 4 | monTEK Motorized Ceiling TV Mount for 43-86 Inch TVs, Heavy-Duty 121lbs (4X Load Tested), Off-Center VESA Compatible, Electric Flip Down with Remote/App/Voice Control, Fits Flat & Pitched Roof |
|
| 5 | Amazon Basics Full Motion Articulating TV Wall Mount, with Swivel and Tilt, for 26\" to 55\" TVs and Flat Panels up to 80 Lbs, VESA Compatible, Black |
|
| 6 | Pipishell Full Motion TV Wall Mount for Echo Show 21/15 and 13-43 Inch Flat Curved Screen TVs & Monitors, Max VESA 200x200mm up to 44lbs, TV Mount Wall Bracket with Rotation Swivel Tilt Extension |
|
| 7 | Perlegear Full Motion TV Wall Mount for Most 42–86 inch Flat Curved TVs up to 132 lbs, 12″/16″ Wood Studs, Bracket with Articulating Arms, Swivel, Tool-Free Tilt, Max VESA 600x400mm PGLF12 |
|
| 8 | MOUNTUP Full Motion TV Wall Mount for Most 26-60 Inch TVs, Max VESA 400x400mm Wall Mount TV Bracket with Swivel Tilting Extension Level Adjustment for LED LCD Flat Curved TVs Up to 77 LBS, MU0018 |
|
| 9 | USX Mount Full Motion TV Wall Mount for Most 42-90 inch Flat Screen/LED/4K, TV Mount Bracket Dual Swivel Articulating Tilt 6 Arms, Max 16\" Wood Studs, VESA 600x400mm, Holds up to 132lbs |
|
| 10 | Mounting Dream TV Wall Mount for Most 37-75 Inch TVs, Universal Tilt TV Mount Fit 16\", 18\", 24\" Stud with Loading Capacity 132lbs, Max Vesa 600 x 400mm, Low Profile Flat Wall Mount TV Bracket |
|
While fixed, tilting, and full-motion mounts cover most needs, specialized options exist for unique situations. These include ceiling mounts for suspending TVs, corner mounts designed to fit snugly into room corners, and even “pop-out” mounts for multi-screen video wall applications, which are often seen in commercial settings.
Choosing the Perfect TV Wall Mount Bracket for Your Home
Selecting the right tv wall mount bracket involves a few critical considerations to ensure safety, compatibility, and an optimal viewing experience.
TV Size & Weight: The Golden Rule
Every TV mount has a specified weight capacity and screen size range it can safely support. Never exceed these limits. Always check your TV’s manual for its exact weight and screen size, then compare it to the mount’s specifications. It’s always better to choose a mount that comfortably exceeds your TV’s weight.
VESA Compatibility: Your TV’s Mounting Language
VESA (Video Electronics Standards Association) defines the standard for mounting interfaces on the back of flat-panel TVs and monitors. You’ll find four screw holes in a square or rectangular pattern on the back of your TV. The VESA pattern is expressed as horizontal distance x vertical distance in millimeters (e.g., 200x200mm, 400x400mm). Your tv wall mount bracket must match or accommodate your TV’s VESA pattern for a secure fit.
Understanding Your Wall Type: The Foundation of Security
The type of wall you’re mounting to dictates the hardware and installation method you’ll need.
- Drywall with Studs: The most common. For maximum safety, your bracket must be secured firmly into the wooden or metal studs behind the drywall. Use a reliable stud finder to locate them.
- Concrete or Brick Walls: These sturdy walls require heavier-duty anchors and specialized masonry drill bits.
- Plaster Walls: These are more brittle and require a gentle approach with appropriate anchors to avoid damage.
- Drywall without Studs: While some heavy-duty toggle anchors exist for drywall-only installations, it’s generally not recommended for larger, heavier TVs. Always prioritize mounting into studs for unparalleled security.
Your Viewing Habits & Room Layout: What’s Your Angle?
Think about how and where you watch TV.
- Do you always sit in one spot directly in front of the screen? A fixed mount might be perfect.
- Is your TV mounted above a fireplace, or do you often deal with sun glare? A tilting mount offers relief.
- Do you watch from different areas in an open-plan room, or need to angle the TV towards a kitchen? A full-motion mount provides the necessary flexibility.
Checklist: Before You Buy Your TV Wall Mount Bracket
- ✅ TV Weight: Is your TV’s weight within the mount’s capacity?
- ✅ TV Size: Does your TV’s screen size fit the mount’s recommended range?
- ✅ VESA Pattern: Does the mount’s VESA compatibility match your TV?
- ✅ Wall Type: Is your wall suitable, and have you identified studs (if necessary)?
- ✅ Viewing Needs: Does the mount type (fixed, tilting, full-motion) meet your desired flexibility?
- ✅ Cable Access: Will you have easy access to ports, or will you need adapters?
The Dikfu.com Professional Installation Guide: Step-by-Step
A safe and secure installation is paramount. While some mounts are DIY-friendly, careful planning and execution are crucial.
Essential Tools You’ll Need
Gathering the right tools beforehand makes the process much smoother:
- Stud Finder: Absolutely essential for locating studs. Consider one that also detects live wires for added safety.
- Level: To ensure your TV is perfectly straight. Don’t eyeball this!
- Electric Drill with Correct Bits: For pilot holes and lag bolts (wood, masonry, or metal bits as needed).
- Socket Wrench or Screwdrivers: To securely tighten bolts and screws.
- Measuring Tape: For precise placement.
- Pencil: For marking.
- Safety Glasses and Gloves: Always protect your eyes and hands.
- Assistant: A second pair of hands is invaluable, especially when lifting the TV.
Preparing for a Smooth Installation
- Safety First: Always have at least one other person to help lift the TV. Before drilling, use your stud finder to check for electrical wires or plumbing within the wall.
- Determine Optimal TV Height: A general rule of thumb is for the center of your TV screen to be at eye level when you are seated. Mark this spot on your wall. You can cut out a piece of cardboard the size of your TV and tape it to the wall to visualize the best placement.
- Inspect Wall Integrity: Ensure the wall itself is sound and free from cracks or weak spots. Reinforce if necessary, or consult a professional if you have concerns about the wall’s structural integrity.
Attaching the Bracket to Your TV (The TV Side)
- Lay TV Face Down: Place your TV face down on a soft, clean surface (like a blanket on a table) to protect the screen.
- Align Mounting Plate: Locate the VESA mounting holes on the back of your TV. Align the mounting arms or plate from your tv wall mount bracket with these holes.
- Secure Screws: Use the screws provided with your mount (or your TV’s manual for recommended screws) to attach the mounting plate securely. Hand-tighten first, then use a screwdriver to ensure a snug fit without overtightening.
Securing the Wall Plate (The Wall Side)
This is the most critical step for security.
- Locate Studs: Using your stud finder, thoroughly scan the wall to pinpoint the exact center of at least two (or more, depending on your mount) wall studs. Mark these clearly with a pencil. Mounting directly into studs provides the strongest support for your TV.
- Position and Level: Hold the wall plate of your tv wall mount bracket against the wall at your desired height, ensuring the stud marks align with the mounting holes on the bracket. Use your level to draw a horizontal guideline, ensuring the plate is perfectly straight.
- Drill Pilot Holes: Following the mount manufacturer’s instructions for drill bit size, carefully drill pilot holes into the center of your marked studs.
- Attach Wall Bracket: Align the wall plate with the pilot holes and secure it firmly to the wall using the lag bolts or screws provided with your kit. Tighten them firmly, but avoid overtightening which could strip the holes. Re-check with your level to confirm it’s still perfectly straight.
“A common mistake I see is rushing the stud-finding process. Taking an extra five minutes here can save you hours of headaches—and potentially a broken TV—down the line. Always double-check your stud marks and use a level; it’s non-negotiable for a safe install.” – Alex Chen, Dikfu.com Lead Installer
Mounting Your TV: The Final Lift
With your wall plate securely in place and the mounting arms attached to your TV, it’s time for the final step.
- Team Lift: With your assistant, carefully lift the TV.
- Align and Hook: Align the mounting arms on the back of your TV with the wall plate. Gently hook or slide the TV onto the wall plate according to your mount’s design.
- Engage Locking Mechanism: Ensure all safety locking mechanisms (often clips, screws, or pull-straps) are fully engaged. This prevents the TV from accidentally being dislodged.
- Test Stability: Give the TV a gentle, controlled shake to ensure it feels stable and secure on the wall.
Optimizing Your Setup: Cable Management & Aesthetics
Now that your TV is beautifully mounted, let’s tackle the details that truly improve your space.
Taming the Cable Chaos
Unsightly cables can quickly detract from your clean wall-mounted TV.
- In-Wall Cable Management: For the most discreet look, consider an in-wall cable management kit. This involves routing cables behind the drywall, often requiring a professional or careful DIY with knowledge of electrical codes.
- Cable Covers/Raceways: Surface-mounted cable covers are an easier DIY solution. They adhere to the wall and can be painted to match your wall color, effectively hiding bundles of wires.
- Cable Ties & Sleeves: For behind-the-TV clutter, use cable ties or fabric sleeves to bundle wires neatly together, preventing tangles and improving airflow.
- Right-Angle Adapters: For fixed mounts where rear ports are hard to reach, right-angle HDMI or power adapters can be invaluable, allowing cables to run parallel to the TV back.
Achieving a Clean, Polished Look
- Soundbar Brackets: Mount your soundbar directly below the TV using a specialized soundbar bracket that attaches to the TV mount itself.
- Floating Shelves: Add floating shelves beneath or to the sides of your TV to hold media players, remote controls, or decorative items, creating a cohesive entertainment unit.
- Accent Wall: Consider painting the wall behind your TV a contrasting color or applying a subtle textured wallpaper to create a focal point and make the TV feel intentionally integrated into the decor.
Troubleshooting Common TV Wall Mount Bracket Issues
Even with the best preparation, sometimes issues arise. Here’s how to tackle the most common problems.
My TV is Tilting or Sagging!
This is often caused by loose tilt adjustment screws or the mount itself not being perfectly level.
- Solution: Locate the tilt adjustment screws on your mount (usually on the TV-side brackets). Gently loosen them, re-level your TV, and then re-tighten. If the entire mount is uneven, you may need to re-adjust the wall plate, ensuring it’s secured firmly into studs.
The Mount Feels Unstable
A wobbly or unstable TV is a serious safety concern.
- Solution: Immediately check all screws and bolts securing the wall plate to the wall and the TV to the mount. Ensure they are firmly tightened. The most common cause is the wall plate not being anchored securely into wall studs. If you suspect this, you’ll need to carefully remove the TV, re-locate studs, and re-mount the bracket properly, using appropriate hardware for your wall type. If the wall itself is compromised, professional structural reinforcement may be necessary.
Cables Are Inaccessible After Mounting
This can happen with fixed mounts or if you didn’t plan ahead for your connections.
- Solution: Consider using right-angle HDMI, power, or coaxial adapters. For persistent issues, a full-motion mount offers the best access. If you have a fixed mount, carefully unhook the TV to access the ports, make your connections, and then remount.
TV Is Too High/Low
Mounting the TV too high can lead to neck strain and an uncomfortable viewing experience.
- Solution: The ideal height centers the TV at your seated eye level. If your TV is too high or low, you may need to remount the wall plate. This is a more involved fix but crucial for long-term comfort. Plan your height carefully during preparation!
improve your Entertainment with Confidence
Installing a tv wall mount bracket is one of the most impactful upgrades you can make to your home entertainment system. It frees up floor space, provides optimal viewing angles, and creates a sleek, modern aesthetic that truly transforms any room. With the knowledge you’ve gained from Dikfu.com—from choosing the perfect mount to executing a flawless installation and troubleshooting any hiccups—you’re now equipped to tackle this project with confidence.
safety and precision are your best tools. Take your time, follow the steps, and don’t hesitate to seek professional help if you encounter challenges beyond your comfort level. Your beautifully mounted TV awaits, ready to deliver years of enjoyment. Visit Dikfu.com for more expert insights and guides to enhance your home setup!
Frequently Asked Questions
What does VESA stand for in TV mounting?
VESA stands for the Video Electronics Standards Association. It is a non-profit organization that establishes universal mounting patterns for display devices, including the standard screw hole configurations found on the back of most TVs and monitors. This ensures compatibility between TVs and mounting brackets.
Is it safe to install a TV mount on drywall without studs?
While some specialized heavy-duty drywall anchors exist, it is generally not recommended for most TVs, especially larger or heavier models. Drywall alone typically lacks the structural integrity to securely support a TV's weight over an extended period. For the safest and most reliable installation, always prioritize mounting into wall studs.
How much space should be left behind a wall-mounted TV?
For optimal airflow and to prevent overheating, it is generally recommended to leave a few inches of space, typically 2-4 inches, behind your wall-mounted TV. Fixed mounts usually offer minimal space, while tilting and full-motion mounts provide more clearance.
What is the ideal height for mounting a television?
The ideal height for mounting a television is when the center of the screen is at eye level while you are comfortably seated in your primary viewing position. This placement helps prevent neck strain and ensures the most comfortable viewing experience for extended periods.
What are the best methods to hide TV cables?
To hide TV cables, you can use in-wall cable management kits for a completely concealed look, which may require professional installation. Alternatively, surface-mounted cable covers (raceways) can be painted to match your wall, or simple cable ties and fabric sleeves can effectively bundle and organize wires behind the TV.
Install a TV Wall Mount Bracket
This guide provides step-by-step instructions for safely and securely installing a TV wall mount bracket, including preparation, attaching the bracket to the TV, securing the wall plate, and finally mounting the TV.
Ensure you have essential tools like a stud finder, level, and drill. Always have an assistant for lifting the TV and use the stud finder to check for electrical wires or plumbing before drilling. Determine the optimal TV height, aiming for the center of the screen to be at eye level when seated, and mark this spot.
Lay your TV face down on a soft, clean surface to protect the screen. Align the mounting arms or plate from your TV wall mount bracket with the VESA mounting holes on the back of your TV. Securely attach the mounting plate using the provided screws, hand-tightening first, then using a screwdriver for a snug fit without overtightening.
Locate at least two wall studs using a stud finder and mark their centers clearly. Hold the wall plate at your desired height, aligning it with the stud marks, and use a level to draw a horizontal guideline. Drill pilot holes into the center of the marked studs, then firmly attach the wall plate using lag bolts or screws, ensuring it remains perfectly straight.
With your assistant, carefully lift the TV. Align the mounting arms on the back of your TV with the wall plate and gently hook or slide the TV onto the plate according to your mount's design. Engage all safety locking mechanisms to prevent accidental dislodgement and gently test the TV's stability to ensure it is secure.
Get our weekly buyer guide
Practical specs, not advice. Unsubscribe anytime.
I found the information on optimal TV height and wall types useful, especially since I have an older house with plaster walls. However, I still struggled a bit with the actual drilling into the wall studs, even with a level. It felt like some of the steps could have used more visual aids for beginners. My TV is up, but it took longer than I expected.
This was a really helpful resource for my home theater project. I appreciated the breakdown of fixed vs. tilting mounts, which helped me decide on a tilting one for my bedroom TV. The installation tips, especially about using a stud finder, were spot on. My only minor gripe is that I wish there was a bit more detail on specific cable management products, but overall, a solid guide.
Finally, a guide that covers everything! I’ve installed a few mounts before, but I always overlooked proper cable management. The suggestions here for hiding wires really elevated the look of my setup. My 75-inch TV now looks like it’s floating, and the immersive experience is incredible. Great job breaking down a complex process into easy steps.
I was so intimidated by the idea of mounting my new 65-inch TV, but this guide made it super clear. The advice on checking VESA compatibility was a lifesaver, and I felt confident picking out a full-motion mount. My living room looks so much cleaner now, and the viewing angles are perfect from anywhere in the room. Definitely recommend following these steps!