Transforming your living space often comes down to clever design choices, and when it comes to home entertainment, the Ceiling Tv Mount is a game-changer. Far beyond simple wall brackets, a ceiling TV mount offers unparalleled flexibility, a sleek aesthetic, and opens up a world of possibilities for how you experience your favorite shows and movies. Whether you’re dealing with limited wall space, aiming for a minimalist design, or seeking the perfect viewing angle from any corner of the room, understanding the ins and outs of a ceiling TV mount is your first step toward an elevated entertainment setup.
At its core, a ceiling TV mount is a specialized system designed to securely suspend your television from the ceiling rather than attaching it to a wall or placing it on a stand. Typically comprising a robust ceiling plate, a sturdy support arm or pole, and a mounting head that connects to the back of your TV via a standardized VESA pattern, these mounts are engineered for stability and versatile positioning.
Unveiling the Different Types of Ceiling TV Mounts
The world of ceiling TV mounts isn’t a one-size-fits-all affair. Each type offers distinct features tailored to various needs and room dynamics.
Fixed Ceiling Mounts: Simplicity Meets Stability
Fixed ceiling TV mounts are the most straightforward option, designed to hold your television in a single, unadjustable position. They extend directly down from your ceiling, providing a clean, static display.
- Pros: Easy to install, often the most budget-friendly, and boast a minimal visual profile. They’re reliable once set.
- Cons: Limited viewing angle; once installed, there’s no tilt or swivel.
- Best Use Cases: Ideal for rooms where the primary viewing area is directly beneath the TV, such as above a bed in a bedroom, or in commercial settings where consistent viewing from a fixed point is desired.
|
Our Picks for the Best TV Mount in 2026
As an Amazon Associate I earn from qualifying purchases.
|
||
| Num | Product | Action |
|---|---|---|
| 1 | Pipishell Full Motion TV Wall Mount for Echo Show 21/15 and 13-43 Inch Flat Curved Screen TVs & Monitors, Max VESA 200x200mm up to 44lbs, TV Mount Wall Bracket with Rotation Swivel Tilt Extension |

|
| 2 | Magnetic Monitor Wall Mount for Steel Surfaces, Fits 13 to 34 Inch Screens, Holds up to 22 lbs, VESA 75/100 Compatible Wall Mount for Computer and TV Monitor, No-Drill Installation with All Screws |
|
| 3 | Amazon Basics Full Motion Articulating TV Wall Mount, with Swivel and Tilt, for 26\" to 55\" TVs and Flat Panels up to 80 Lbs, VESA Compatible, Black |
|
| 4 | USX MOUNT Full Motion TV Wall Mount for Most 32-70 inch TVs up to 99 lbs, Wall Mount Bracket with Dual Articulating Arms, Swivel, Tilt, Max VESA 400x400mm, TV Mount Fits 12”/16” Wood Studs |
|
| 5 | Mounting Dream TV Wall Mount for 32-65 Inch Television,Mount with Swivel and Tilt, Full Motion Bracket with Articulating Dual Arms, Fits 16inch Studs, Max VESA 400X400 mm, 99lbs, MD2380 |
|
| 6 | USX Mount Full Motion TV Wall Mount for Most 42-90 inch Flat Screen/LED/4K, TV Mount Bracket Dual Swivel Articulating Tilt 6 Arms, Max 16\" Wood Studs, VESA 600x400mm, Holds up to 132lbs |
|
| 7 | MOUNTUP Full Motion TV Wall Mount for Most 26-60 Inch TVs, Max VESA 400x400mm Wall Mount TV Bracket with Swivel Tilting Extension Level Adjustment for LED LCD Flat Curved TVs Up to 77 LBS, MU0018 |
|
| 8 | Perlegear Full Motion TV Wall Mount for Most 42–86 inch Flat Curved TVs up to 132 lbs, 12″/16″ Wood Studs, Bracket with Articulating Arms, Swivel, Tool-Free Tilt, Max VESA 600x400mm PGLF12 |
|
| 9 | monTEK Motorized Ceiling TV Mount for 43-86 Inch TVs, Heavy-Duty 121lbs (4X Load Tested), Off-Center VESA Compatible, Electric Flip Down with Remote/App/Voice Control, Fits Flat & Pitched Roof |
|
| 10 | Mounting Dream TV Wall Mount for Most 37-75 Inch TVs, Universal Tilt TV Mount Fit 16\", 18\", 24\" Stud with Loading Capacity 132lbs, Max Vesa 600 x 400mm, Low Profile Flat Wall Mount TV Bracket |
|
Articulating (Adjustable) Ceiling Mounts: The Freedom to View
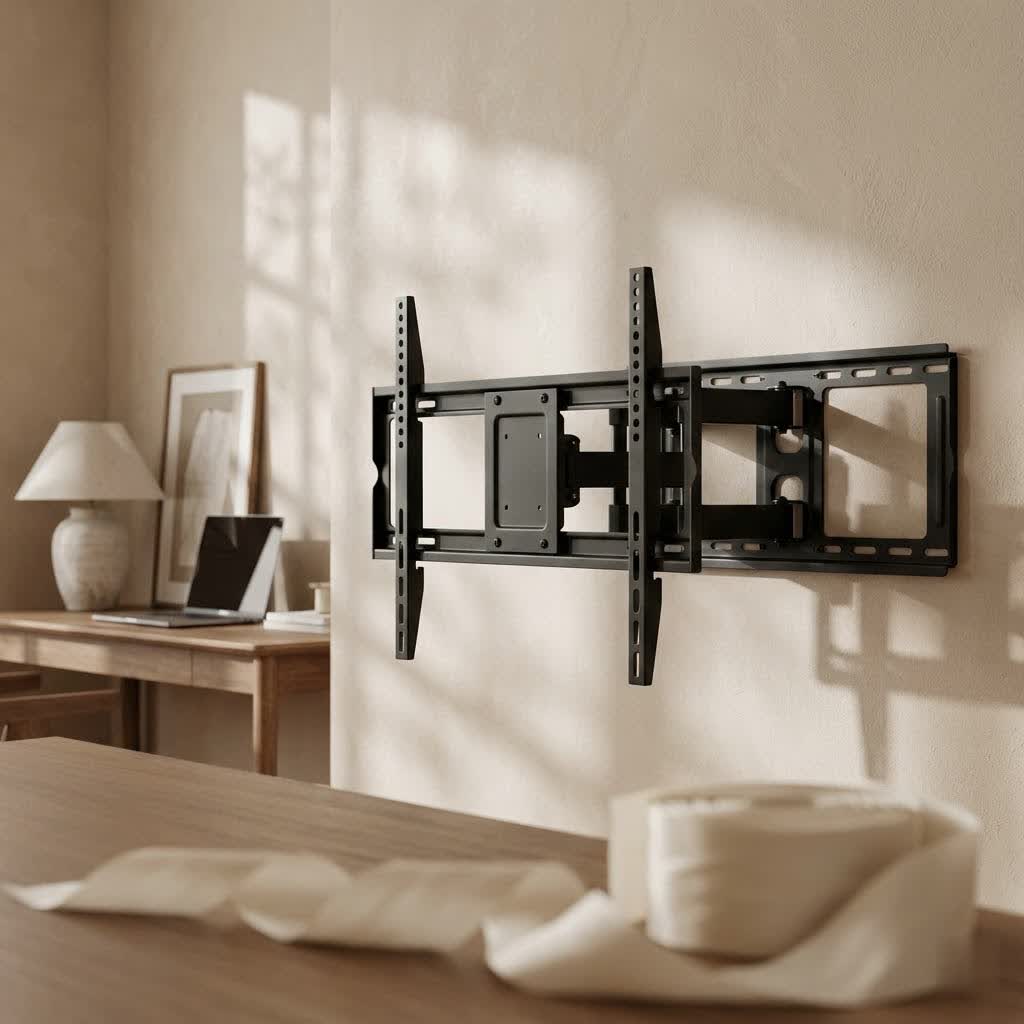
For those who crave flexibility, articulating ceiling TV mounts are a popular choice. These mounts feature adjustable arms that allow your TV to tilt, swivel, and sometimes extend further from the ceiling.
- Pros: Offers a wide range of motion, allowing you to fine-tune your viewing angle, reduce glare, and adapt to different seating arrangements. Perfect for open-concept spaces or rooms with multiple viewing zones.
- Cons: Generally more complex to install than fixed mounts and can be pricier due to their advanced mechanics.
- Best Use Cases: Living rooms, master bedrooms, and office spaces where dynamic viewing angles are crucial for comfort and engagement.
Motorized Ceiling Mounts: Elevate Your Entertainment
Stepping into the realm of luxury and innovation, motorized ceiling TV mounts are the pinnacle of discreet integration. These advanced systems use electric motors to either flip your TV down from the ceiling or drop it down from within a ceiling cavity, often at the touch of a button.
- Pros: Provides a high-end, futuristic aesthetic, completely hiding the TV when not in use. They offer precise, customizable height and angle control. Many models integrate with smart home systems like Amazon Alexa or Google Home.
- Cons: Significantly more expensive, require professional installation, and need a dedicated power supply.
- Best Use Cases: High-end home theaters, luxury living spaces, and conference rooms where a hidden TV setup is desired for a clean, unobstructed look.
Low-Profile Ceiling Mounts: Sleek and Discreet
Low-profile ceiling mounts are engineered to minimize the distance between the ceiling and the top of your TV, creating a flush, integrated appearance. Some may even require recessed installation.
- Pros: Delivers an incredibly sleek and modern aesthetic, reducing visual clutter and maximizing overhead space.
- Cons: Often limited in adjustability compared to articulating mounts and may be restricted to specific ceiling types for optimal integration.
- Best Use Cases: Modern interiors where minimalism is key, and spaces where every inch of vertical clearance matters, like rooms with slightly lower ceilings.
Choosing the Perfect Ceiling TV Mount: A Step-by-Step Selection Guide
Selecting the right ceiling TV mount is paramount for both safety and optimal viewing pleasure. Here’s how to make an informed decision, ensuring your setup is secure and meets your entertainment needs.
Know Your TV Inside Out: Weight, Size, and VESA
Before you even glance at a mount, you need to understand your television’s specifications. The TV’s weight, screen size, and VESA (Video Electronics Standards Association) pattern are critical. The VESA pattern refers to the four screw holes on the back of your TV, measured in millimeters (e.g., 200x200mm, 400x400mm).
“Always cross-reference your TV’s manual for its exact VESA pattern and weight,” advises Mark Harrison, Dikfu’s Lead Mounting Specialist. “A mount that doesn’t match these specs is a safety hazard waiting to happen.” The mount you choose must explicitly state compatibility with your TV’s VESA pattern and be rated to support at least twice, and ideally up to five times, your TV’s weight.
Ceiling Structure Matters: Wood, Concrete, or Steel?
The type and integrity of your ceiling structure are non-negotiable considerations. Different materials require specific fasteners and installation techniques.
- Wood Joists/Beams: The most common scenario for residential installations. You’ll need to locate these structural members using a stud finder and secure the mount with lag screws.
- Concrete, Brick, or Stone: Requires a masonry drill bit and specialized concrete anchors or bolts for a secure fastening.
- Steel Beams: Less common in residential settings, but in commercial or industrial spaces, steel beams require specific metal-grade fasteners.
- Drywall Alone: Never rely on drywall anchors alone for a ceiling TV mount. Drywall cannot safely support the weight of a TV, leading to potential catastrophic failure. If mounting between joists is unavoidable, a crossbeam reinforcement kit is essential.
Tailoring to Your Viewing Needs: Drop Length and Adjustability
Consider where you’ll be watching your TV and how you want to interact with it.
- Drop Length: This determines how far your TV hangs from the ceiling. For beds, you might want a shorter drop, while a gym or commercial space might require a longer extension for better visibility.
- Swivel & Tilt Range: If you need to adjust the screen to reduce glare or view from multiple seating areas, ensure your chosen articulating mount offers sufficient swivel (e.g., 90° or 360°) and tilt (e.g., ±15°).
Don’t Forget the Details: Cable Management and Certification
Small details make a big difference in both aesthetics and long-term functionality.
- Cable Management: Look for mounts with integrated cable channels or hollow poles. This feature allows you to route HDMI, power, and coaxial cables internally, keeping your setup clean and clutter-free.
- Safety Certification: Prioritize mounts that are UL-certified (Underwriters Laboratories) or have equivalent safety certifications. This indicates that the product has been rigorously tested for safety and durability.
- Material & Build Quality: Opt for mounts made from powder-coated steel or durable aluminum alloys to ensure resistance to corrosion and stress fatigue over time.
Your Comprehensive Installation Guide to a Secure Ceiling TV Mount
Installing a ceiling TV mount is a rewarding DIY project, but it requires precision and a commitment to safety. Here’s a step-by-step guide to get your TV hanging securely.
Step 1: Gear Up – Essential Tools for the Job
Preparation is key. Gather all necessary tools before you begin:
- The ceiling TV mount kit (check for all included hardware: fasteners, washers, spacers, Allen wrenches)
- Power drill and appropriate drill bits (wood and/or masonry)
- Electronic stud finder (an edge-to-edge model is recommended)
- Ladder (ensure it’s stable, have a helper hold it if needed)
- Pencil for marking
- Measuring tape
- Level
- Screwdriver (Phillips #2 is common)
- Socket wrench with appropriate sockets
- Safety glasses and gloves
- Your TV
- A helper (this is often a two-person job!)
Step 2: Preparing Your TV – VESA and Bracket Attachment
Begin by attaching the mounting brackets to the back of your television.
- Inspect VESA Slots: Locate the threaded mounting holes on the back of your TV. These form the VESA pattern. Consult your TV manual if unsure.
- Attach Brackets: Position the TV mounting brackets, usually long metal pieces, over the VESA slots. Ensure the screw holes align perfectly. Use the fasteners, washers, and spacers provided with your mount. Spacers are crucial if your TV has an uneven or curved back.
- Ensure Alignment: Before fully tightening, make sure the brackets are evenly aligned to prevent your TV from hanging crooked. Tighten all screws firmly but do not overtighten, as this can damage the TV.
Step 3: Unveiling Your Ceiling’s Secrets – Locating Structural Support
This is the most critical step for safety. Your mount must be anchored into solid structural members.
- Position Ladder: Place your ladder securely where you intend to mount the TV.
- Locate Studs/Joists: Use your stud finder to locate ceiling joists or beams. Pass the stud finder back and forth to confirm their edges.
- Mark Locations: Lightly mark the center of the studs with a pencil. You’ll need at least two, and often four, solid points for a secure installation.
Step 4: Precision Drilling – Creating the Anchor Points
Drilling pilot holes correctly is essential for a strong, secure fit.
- Outline Mount: Hold the ceiling mounting plate against the marked stud locations on the ceiling. Use your pencil to trace its outline and mark the exact points where the screws or bolts will go.
- Drill Pilot Holes:
- For Wood Joists: Pre-drill pilot holes using a drill bit slightly smaller than your lag screws, typically 7/32” for 3-inch lag screws. Drill 3 inches deep.
- For Concrete, Brick, or Stone: Pre-drill holes using a masonry drill bit (e.g., 7/16” for 3-inch anchors). Insert plastic anchors into these holes, gently tapping them flush with a hammer if needed.
- Cable Management (Optional): If you plan to conceal cables within the ceiling, drill a larger hole (check your mount’s manual for recommended size) for cable pass-through, ensuring it doesn’t compromise structural integrity or hit any utility lines.
Step 5: Securing the Mount Base – The Foundation of Safety
Now, attach the main ceiling plate.
- Align Plate: Align the mounting plate with your pre-drilled holes and marked stud locations. Ensure any cable pass-through holes are correctly positioned.
- Fasten Securely:
- Wood Joists: Use a socket wrench to drive the lag screws with washers firmly into the wood joists until they are snug. Do not overtighten.
- Concrete: Use lag screws and washers, tightening them into the plastic anchors (or directly into pre-drilled holes if your mount uses specific concrete bolts) with a socket wrench. Ensure anchors are flush.
- Verify Stability: Give the installed ceiling plate a firm tug. It should feel absolutely solid with no movement.
Step 6: Connecting the Pieces – Assembling the Extension (If Applicable)
Many ceiling mounts feature an extension pole or arm to achieve the desired drop length.
- Assemble Extension: Attach the extension pole to the ceiling mounting plate using the fasteners provided in your kit.
- Adjust Height: If your mount offers adjustable drop length, set it to your preferred viewing height and secure it tightly with the designated locking screws or bolts. Ensure all connections are robust.
Step 7: The Grand Finale – Hanging Your TV with a Helping Hand
This step absolutely requires a helper to ensure safety and prevent damage.
- Lift TV: With your helper, carefully lift the TV, aligning the attached TV mounting brackets with the corresponding rails or hooks on the ceiling mount extension or plate.
- Engage Hooks/Rails: Gently hook or slide the TV brackets onto the mount. For many designs, you’ll engage the bottom hooks first, then tilt the TV up to secure the top hooks.
- Secure TV: Do not release the TV until you are certain both the top and bottom of the brackets are fully engaged. Once in place, use the mount’s locking screws or safety pins to firmly secure the TV, preventing accidental dislodgement.
Step 8: Fine-Tuning Your View – Adjusting for Perfection
Once your TV is securely hung, it’s time for the final adjustments.
- Leveling: Use the mount’s leveling screws (if available) to ensure your TV is perfectly horizontal.
- Tilt & Swivel: Adjust the tilt and swivel to achieve your optimal viewing angle and reduce glare. Tighten all adjustment knobs or bolts once satisfied.
- Cable Management: Route all cables through the integrated channels in the mount or through the hole you drilled in the ceiling. Secure them with ties or covers for a clean, professional finish.
Common Pitfalls and How to Sidestep Them During Installation
Even experienced DIYers can make mistakes. Being aware of these common pitfalls can save you headaches and ensure a safer installation.
Mismatched Mount and TV Specifications
One of the most frequent errors is selecting a mount that doesn’t properly support your TV’s weight or VESA pattern. This mismatch can lead to mount failure, TV damage, or even injury. Always double-check these critical specifications before purchasing.
Neglecting Ceiling Structure Assessment
Assuming your ceiling can support any TV mount without verifying structural integrity is incredibly dangerous. Drywall alone is insufficient. Failure to locate and anchor into solid wood joists, concrete, or steel beams can cause the mount to pull free. “Never guess when it comes to ceiling structure; always use a stud finder and, if unsure, consult a professional,” advises Mark Harrison.
Poor Cable Management Planning
Ignoring cable management can lead to a messy, unprofessional look and potential tripping hazards. Plan how you’ll route and conceal cables before installation. Utilizing integrated cable channels or in-ceiling wiring will maintain a sleek aesthetic.
Attempting Solo Installation
While some small, lightweight TVs might be manageable, installing a ceiling TV mount, especially with larger screens or complex articulating models, is a two-person job. Lifting and securing a heavy TV overhead safely requires an extra set of hands. Don’t risk injury or damage by going it alone.
Maximizing Safety and Longevity: Dikfu’s Expert Tips
Your ceiling TV mount is a long-term investment. To ensure continued safety and performance, incorporate these expert tips into your routine.
- Regular Inspections: Periodically (every 2-6 months), check all bolts, screws, and connection points on your mount. Temperature fluctuations, minor impacts, and everyday wear can cause hardware to loosen over time. Tighten anything that feels even slightly loose.
- Adhering to Weight Limits: Reiterate and strictly adhere to the mount’s stated weight capacity. Overloading can stress the mount and ceiling structure, increasing the risk of failure.
- Professional Consultation: If you have any doubts about your ceiling’s ability to support the weight, are dealing with complex ceiling types (e.g., plaster, old lath and plaster), or are uncomfortable with any step of the installation, don’t hesitate to consult a professional installer or a structural engineer. Their expertise ensures peace of mind.
- Avoiding Utility Lines: Always be vigilant for electrical wires, water pipes, or gas lines when drilling into your ceiling. A stud finder can help detect electrical wiring, but extra caution is advised, especially in older homes.
The Dikfu Difference: Why a Ceiling Mount Elevates Your Home
Embracing a ceiling TV mount offers a host of compelling advantages that go beyond mere functionality, truly elevating your home entertainment experience and interior design.
- Space Optimization: By leveraging overhead space, you free up valuable floor and wall real estate. This is particularly beneficial in smaller apartments, multi-functional rooms, or when you want to keep walls clear for art or shelving.
- Unparalleled Viewing Flexibility: With articulating or motorized options, you can achieve the perfect viewing angle from anywhere in the room, whether you’re relaxing in bed, cooking in the kitchen, or entertaining guests in an open-plan living area.
- Sleek and Modern Design: A properly installed ceiling TV mount provides a clean, contemporary aesthetic. When paired with effective cable management, it creates a minimalist look that enhances modern home décor.
- Child and Pet Safety: Mounting your TV securely from the ceiling keeps it safely out of reach of curious children and playful pets, significantly reducing the risk of accidental tipping or damage.
Conclusion: Your Path to a Perfect Ceiling-Mounted TV Begins Here
Choosing and installing a ceiling TV mount can transform your home entertainment, offering a blend of sophisticated design, space-saving practicality, and superior viewing flexibility. By carefully considering your TV’s specifications, assessing your ceiling structure, selecting the right mount type, and following a meticulous installation process, you can confidently achieve a secure and stunning setup. Remember, safety and precision are paramount, and when in doubt, a professional touch can make all the difference.
Ready to take your home entertainment to new heights? Visit Dikfu.com for more in-depth guides, expert advice, and the latest innovations in TV mounting solutions, helping you create a home entertainment system that’s safe, stylish, and perfectly tailored to your lifestyle.
Frequently Asked Questions (FAQs) About Ceiling TV Mounts
Q: Can I install a ceiling TV mount by myself?
A: Yes, many homeowners with moderate DIY experience and the right tools can install a ceiling TV mount. However, for heavier TVs, complex motorized systems, or if you’re unsure about your ceiling structure, professional installation is highly recommended to ensure safety and proper functionality.
Q: How do I know if my ceiling can support a TV mount?
A: Your ceiling must have solid structural members, such as wood joists or steel beams, to anchor the mount. Use an electronic stud finder to locate these. Drywall alone will not safely support a TV mount. If you have plaster ceilings or are uncertain, consult a structural engineer or professional installer.
Q: What TV sizes are compatible with ceiling mounts?
A: Most ceiling TV mounts are designed to accommodate a wide range of flat-panel TVs, typically from 32 inches up to 85 inches or more. The crucial factors are your TV’s weight and its VESA mounting pattern, which must match the mount’s specifications. Always verify these before purchase.
Q: Are motorized ceiling mounts worth the investment?
A: Motorized ceiling mounts are a significant investment, but they offer unparalleled convenience, a luxury aesthetic, and the ability to completely conceal your TV when not in use. They are particularly worth it for dedicated home theaters, high-end living spaces, or commercial applications where a hidden, remote-controlled solution is desired.
Q: How do I hide the cables for my ceiling-mounted TV?
A: Many ceiling TV mounts feature integrated cable management channels within their support poles, allowing you to route wires discreetly. Alternatively, you can drill a hole in the ceiling (ensuring no utility lines are present) to run cables into the ceiling cavity and then down through a wall to an outlet, creating a completely wireless look.